Pears, Blackberries, Peaches, Apples, Plums, Pecan
All posts by Salinda
Make Your Own Skirt Pattern, Part 2
Ready to make a skirt that fits you beautifully? Let’s get started. You’ll need your measurements, some freezer paper or tissue paper, and a ruler. A dressmakers’ curve would also be helpful, but it’s not totally necessary.
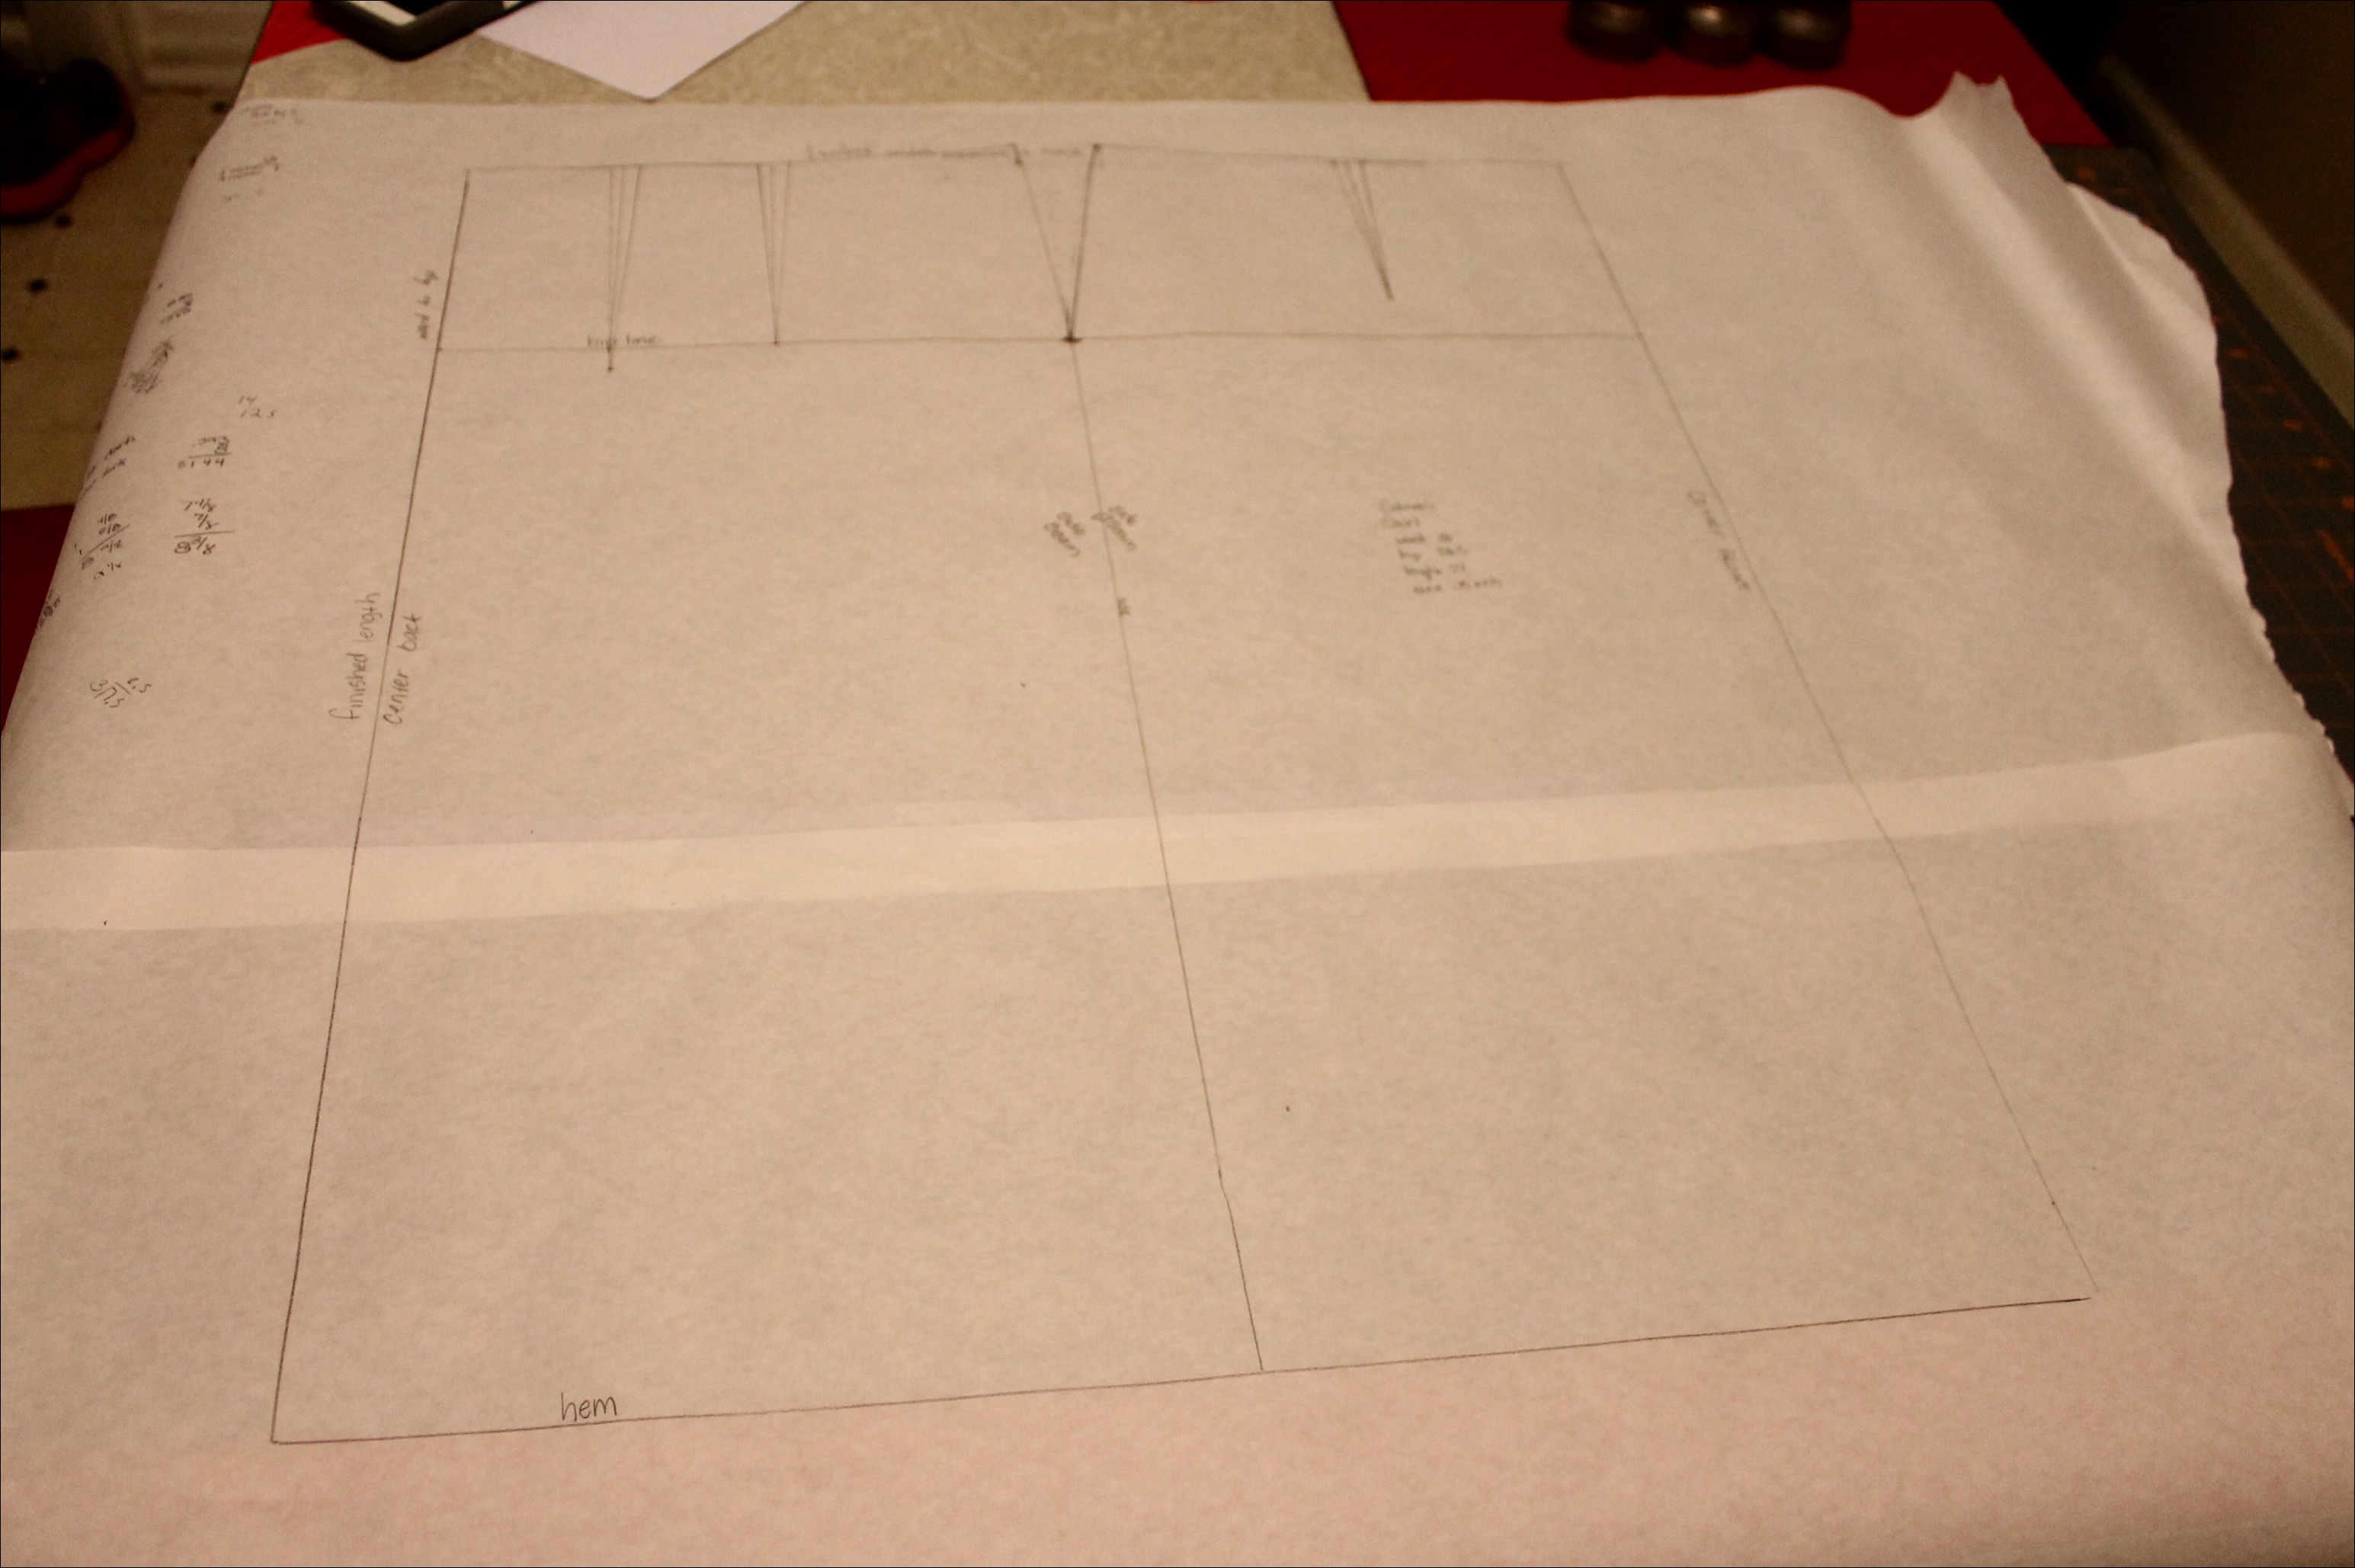
Here’s my sloper. I use two pieces of freezer paper taped together for the width.
So here’s how you do it:
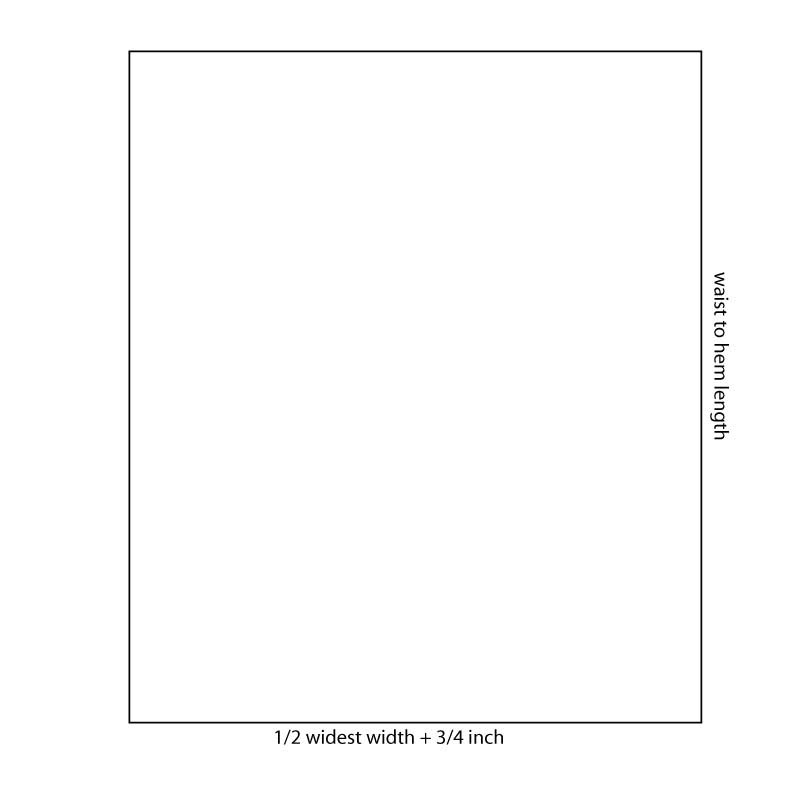
1. Draw a rectangle. The rectangle should be as long as your waist to hem measurement and as wide as 1/2 your widest width.
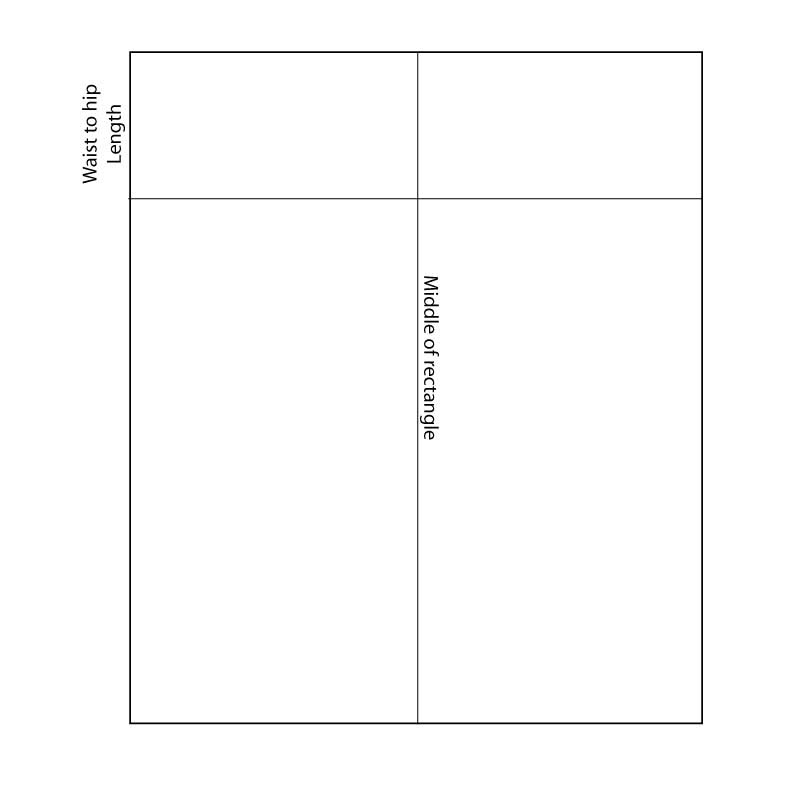
2. Draw a line from top to bottom down the center of your rectangle. Draw a second line across your rectangle at your hip measure. This line should be down from the top the distance of your waist to hip measurement.
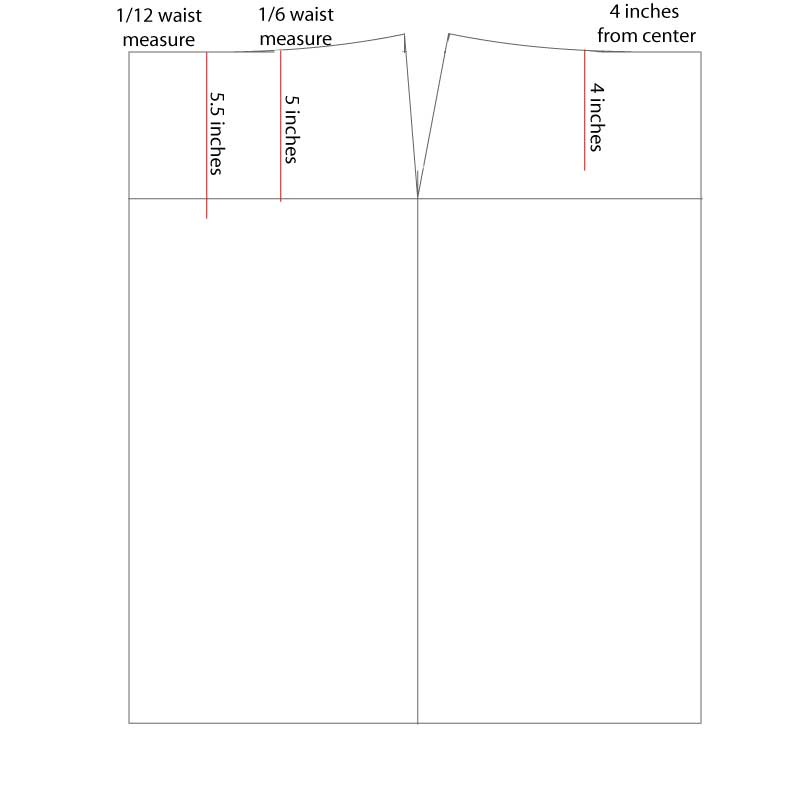
3. Now we are going to start drawing the waist. Divide your waist measurement by 4. Add 1 5/8 inch to this measurement. Make a mark that distance from the LEFT edge along the top. Draw a small line up 5/8 inch up from there. Now, add 7/8 inch to 1/4 your waist measure. Make a mark that distance from the RIGHT edge along the top. Draw another small line up 5/8 inch from that point.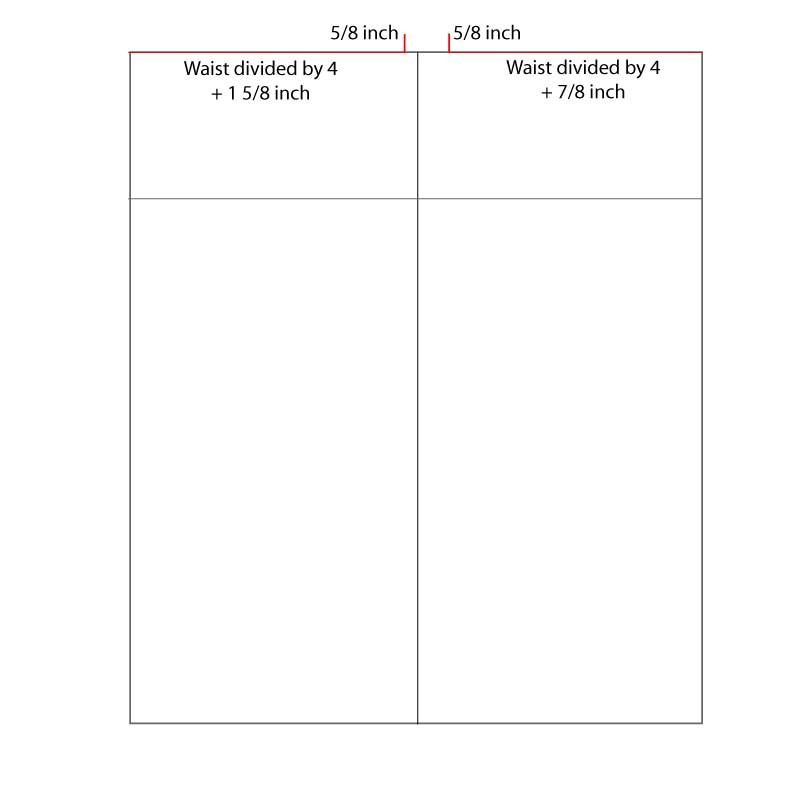
4. Now we need to create our waist curve using these new lines. Draw a curving line from the center of each narrow rectangle to connect with the top of the small line you drew up from the waist line. A dressmaker’s curve will help, but if you don’t have one, just do your best.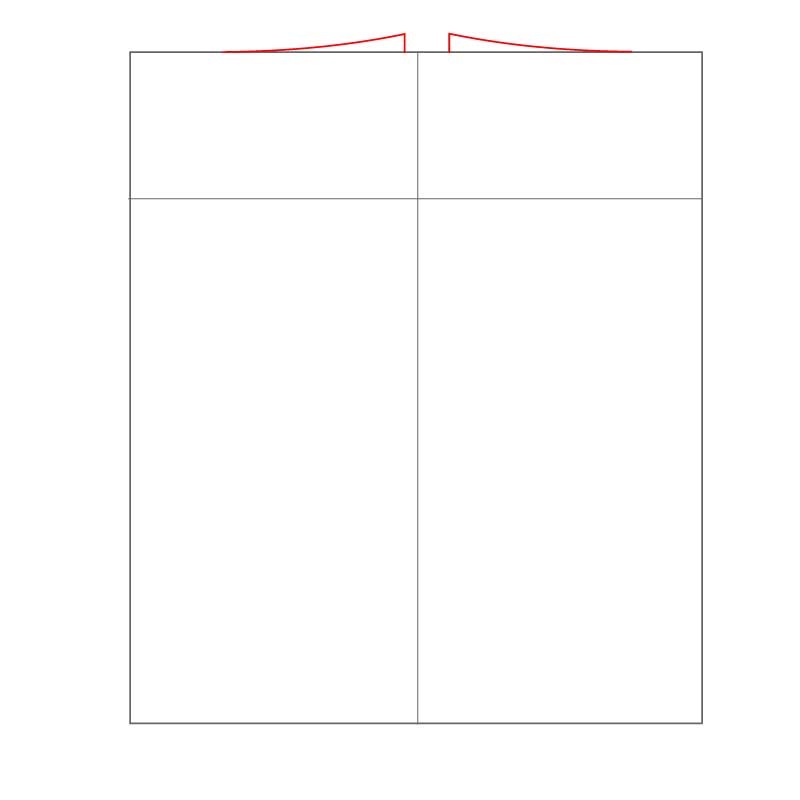
5. Time to connect your waist to your hips. Your waist to hip line may have more curve than mine. That’s fine if it does. That’s why we are making our own personal skirt pattern. To do this, draw a slightly curved line from the top of your waistline to your hip point (where your hip line intersects your midline). Mine is almost straight because my waist is not a whole lot smaller than my hips. Yours may be.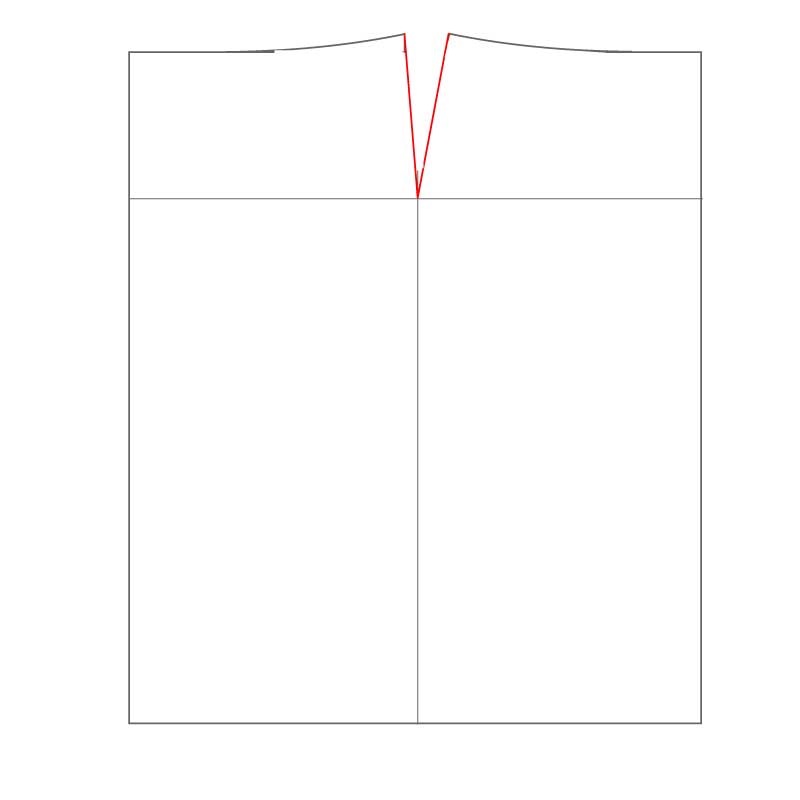
6. Time to draw the darts. The darts are how this flat piece will fit our curves. Let’s work on the darts on the left first. Divide your waist measurement by 12. Measure in this distance from the left edge. Draw a line 5.5 inches down from this point. For the second back dart, divide your waist measurement by 6. Draw a line 5 inches down from this point. Now for the front darts. Draw a line 4 inches down, 4 inches from the right edge.
7. Now to make these lines into darts, just draw triangles. The base of each triangle is 5/8 inch wide and is centered over your dart line. The base is along your waistline and the point of the triangle should touch the bottom of your dart line. 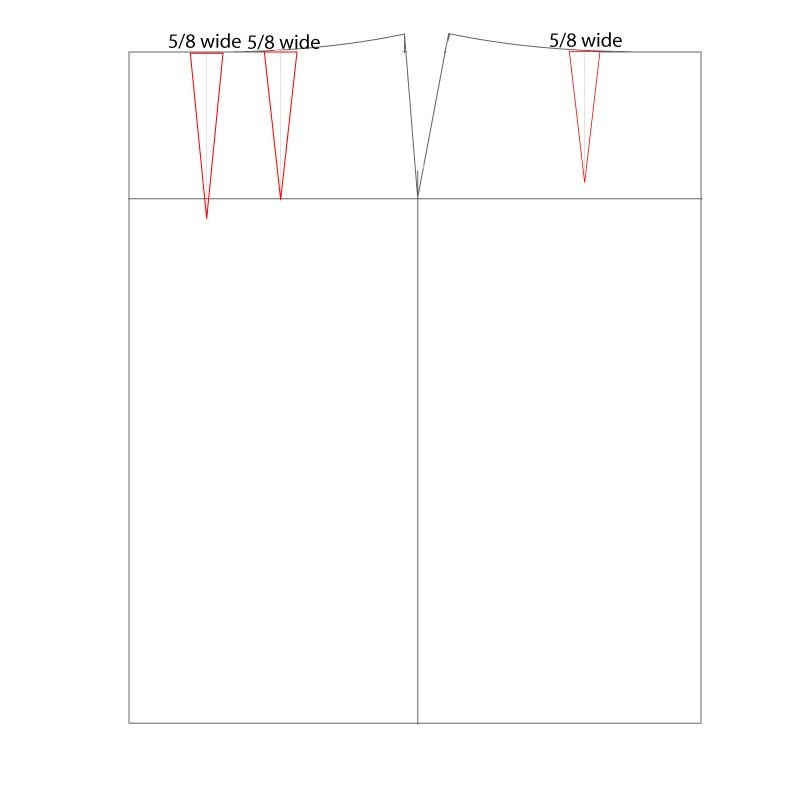
8. Almost done! Label your sloper. Here are the labels I use.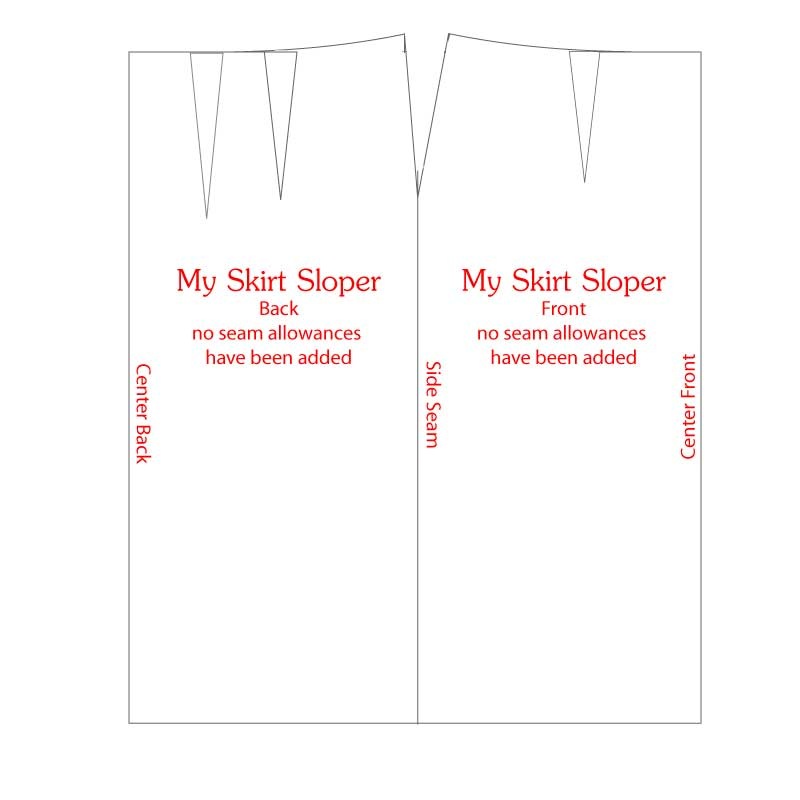
So…how’d you do?
Here’s your assignment for next time:
1. Cut out your sloper. Don’t forget to cut down that center line, separating your front and back pieces.
2. Trace both pieces of your sloper onto another sheet and add 1 inch around each piece. Be sure to trace your darts too.
3. Grab some fabric to make a muslin (a practice skirt). You can raid your stash or grab something from the remnant bin at your favorite shop. You’ll need 1 1/2-2 yards (basically, 2 x your waist to hip measure).
March Sewing Day
I’m so excited about our March Sewing Day! I’ll be at Lil’ Miss Priss on Thursday, March 13 offering 3 45-min sewing tutorials! You can join me for 1, 2, or all 3. Here’s the schedule:
11:00 What size should I sew?
12:00 Twin needle sewing
1:00 Hemming feet
Message me to reserve your spot!
Happy Weekend: Hebrews 11:1
Monday, March 10 Sewing Class
So…you know how to thread your machine and sew a simple straight stitch. Are you ready to learn something new? Maybe ruffles and topstitching? Then here’s the class for you:
What Else Can Your Machine Do?
Monday, March 10
9am-noon
@LSUS.
Sign up here.
Make Your Own Skirt Pattern
Ever wish you could design your own clothes? Clothes that fit you perfectly? Well…if you can sew, you can! Let’s start with an easy project and make your own skirt pattern.
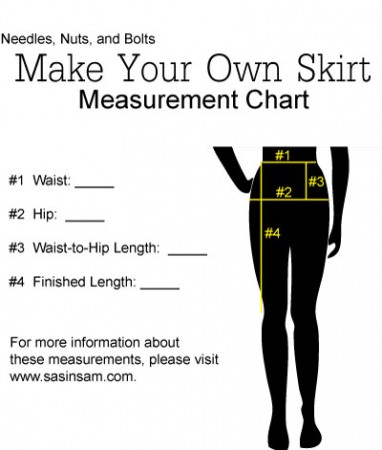
Skirts are easy because they only require a few measurements: waist, hip, waist-to-hip length, and length.
Waist: This should be the point where your skirt will sit. For me, this is usually about 1 inch below my waist.
Hip: This is the fullest part of your hip/rear.
Waist-to-Hip Length: This is the vertical measure between your waist measure to your hip measure.
Length: This is from your waist measure to where you want your skirt to fall.
A few notes about measuring:
- Measure to the nearest half inch,
- Don’t “cinch” the tape around you but it should be snug.
- Don’t suck in.
- Do measure over the same undergarments your will wear with the finished product. If you will be wearing this skirt with Spanx then measure over your Spanx. If you will be wearing over a slip, then measure over a slip.
Tonight’s assignment:
1. Get your measurements.
2. Gather some freezer paper, tissue paper, wrapping paper, or butcher paper; a ruler; and a pencil for Thursday. That’s when we’ll draw!

