Category Archives: Being Creative

Fostering creativity through sewing and other hobbies

Book Review: Of Course You Can Sew!

Of Course You Can Sew! Basics of Sewing for the Young Beginner
by Barbara Corrigan
Published in 1971
ISBN: 978-0385076975


Some Chapter Headings:
Equipment
Fabrics
Accessories from a Straight Piece of Material
A Shift or Robe from Turkish Towels
How to Use Patterns

I liked:

  • The prose. For example, take this paragraph from the Introduction, “Haven’t you envied your friends who have an endless supply of new clothes which they’ve made for themselves? You hear tales of how an inexpensive piece of material from a remnant counter has turned into a lovely party dress, while you’ve been trying to figure out how to persuade Dad to give you still another advance on your allowance to cover a down payment on that dress you saw in the store window.”
  • The chapter on “Basic Stitches” that covers everything from threading a needle and diagrams showing how to knot your thread to explaining running stitches, back stitching and hemming.
  • Instructions on how to use a thimble (a lost art for certain!).
  • A great chapter on the basic sashes, belts, totes and headbands.
  • The “How to Use Patterns” chapter that is most thorough, including pinning, marking darts and notches, stay stitching, and facings.

My dislikes:

  • Not any really, especially when you consider this is a book for beginners.

Conclusion:
“Cute.” That’s the word I’d use to describe this book. I think it is absolutely darling. I love the way it’s written. It covers the most basic of basic (“Now place two layers of material together, and pin them together.”, page 22) while also explaining techniques like under stitching. Plus, I love the confidence it exudes when, in closing, it promises “When you have learned to make all the things presented in this book, you will be able to create an almost complete wardrobe, lacking only a coat and slacks…” (page 127).

Would I buy it for myself?
As a sewing instructor, I am considering this book. I think the progression it uses to teach sewing would work very well for beginners of any age.

Would I buy it for a beginner sewer?
Most certainly. This book would be perfect for someone that has never sewn, but is ready to start.

My 5 Favorite Sewing Tips

Here are my 5 favorite sewing tips (for today anyway, because tomorrow I’ll probably learn something new):

  1. Wet the back of your needle before trying to thread it. The surface tension from the water pulls the thread right on through.
  2. Compare your pattern pieces to a RTW piece that has a similar fit. This is particularly helpful if you’re fitting a difficult client (like my hubby).
  3. Instead of chalk, mark your notches, darts, etc. with a dried-up remnemt of Ivory soap.
  4. Put a shirt together at one shoulder (or if it has raglan sleeves–at 3 seams). While it’s flat, serge your neck binding (or cuffs onto sleeves) on the neck line. (I find it easiest to place if I’ve notched center front, shoulders and center back on both the shirt and the ribbing.) Then serge the remaining shoulder seam, all the way up the ribbing.
  5. Choose your pattern size based on your front width measurement (FWM). This is a great N. Zieman tip. To take the measurement, find the crease in your skin where your arms meet your body and measure straight acros your chest. Round off to the nearest half-inch. A FWM of 14 inches corresponds to a size 14 and every 1/2 inch difference is a pattern size. (I.e., 13.5 inches = size 12, 13 inches = size 10, 14.5 inches = size 16, 15 inches = size 18)

Book Review: Applique Martha’s Favorites

Applique Martha’s Favorites
by Martha Pullen
Published in 1991
ISBN: 978-9992865163

Some Chapter Headings:
Types of Applique
Stitch Maneuvers
Applique Designs
Fancy Closures-Not Just Buttons

I liked:

  • The clothing patterns included with this book: a girls’ jumper, a boys’ suit, and an apron.
  • A great supply list that explains why you need all those things, like stabilizer and interfacings.
  • The very detailed (at first glance primitive, but actually quite informative) diagrams in the “Stitch Maneuver” chapter that instruct you as you begin to applique, turn inward or outward curves, form corners and stitch points.
  • The “Little Red Riding Hood” applique design.

My dislikes:

  • While some of the designs are very cute, others are quite dated (think things we wore in the 70s!).
  • I found the boys’ suit to run very small.
  • No instructions for sewing snap tape into the crotch of the boys’ suit.

Conclusion:
First, this book is a bargain, when you consider all that it contains. Just purchasing a girls
jumper and a boys’ suit pattern could run you upwards of $20. Plus, you get all the applique designs and how-tos.

Second, if you can sew, you can applique and this book is detailed enough to show you how. Even if you don’t love these designs, you can take this information and make your own designs.

Would I buy it for myself? I already did–several years ago, when I wanted to reproduce similar designs to those I’d seen at a local upscale children’s boutique. While I don’t refer to the book often anymore, it was invaluable while I was learning to applique.

Would I buy it for a beginner sewer? This book would better serve an advanced beginner.

Book Review: Every Woman’s Book of Fashion Design

Every Woman’s Book of Fashion Design
by P. J. Ireland
Published in 1972
ISBN 877492336

Some Chapter Headings:
Lines
Proportions
Sleeves
Fabric Treatments
Figure Proportions

I liked:

  • The line drawings showing collar styles, pleat styles, and cuff variations.
  • The simplicity of the black and white drawings that illustrate the effects of darker colors and lighter colors and placement on the body.
  • The great list of definitions in the back of the book.

My dislikes:

  • The model sketched throughout the book was tall and leggy. Not at all true to life (at least not my life).

Conclusion:
This book is a little treasure–perhaps the best illustrations I’ve seen on using lines and colors to flatter your figure.

Would I buy this book for myself? I can see how this book would be very useful for the person sewing clothes for themselves. So often we sew something because it’s cute on the envelope, but this would also help a person determine if it would be cute on a real body.

Would I buy this book for a beginner? This book would be a great addition to the library of a budding fashion designer.

Welcome to My Sewing Space

After several months years of hiding fabric, shuffling patterns, and storing supplies in every room of my home, I finally have my sewing space the way I want it! Would you like a peek?


Welcome to my sewing space. That’s right, I said “space”. I share the family’s only dining area. My space stretches from door frame to door frame along one wall in our kitchen/dining room. And, I’m proud to say that all my gear (except one small box in the top of my closet) is in this area!

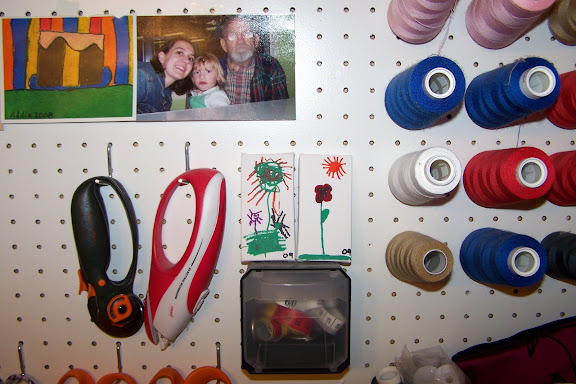
You can see my Janome 9000 and my serger. I keep the manuals for both right behind them on the peg board. Speaking of the peg board, didn’t my hubby do a great job painting it to match the trim in the kitchen/dining room? It is super handy and I can see my supplies and grab them easily. Even more importantly, I can easily put everything away.

My sewing table is a 2′ x 4′ folding table from Sams. I have 2 pieces of shelf gripper stuff under my machines to keep them from walking. I have 4 large bins of fabric and several shoeboxes of trims hidden under that lovely red and white table skirt. (My table is extended to its highest point and I stand while sewing.) To organize my fabric, I have a swatch of each stapled to an index card. The card also lists the yardage of the fabric and which bin it is hidden in. I keep these on keychain rings hanging on my peg board:

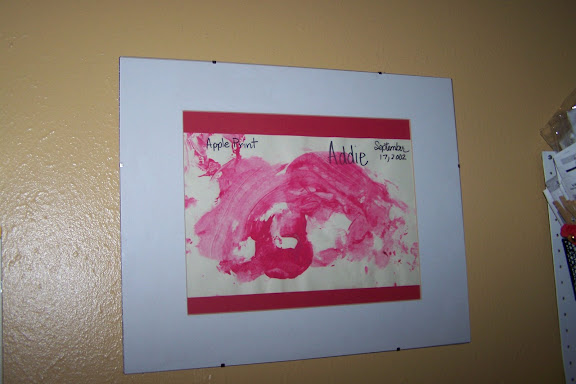
To sew, you must have some inspiration, right? I’ve surrounded my dining room and my sewing space with some of my favorite artwork by my favorite artists! This is the BG’s first print. All the other 1-year-olds in her class brought home a piece of paper with 6 perfect apple prints. Not my little painter. She took the apple from the teacher and printed it by herself:


I also use my peg board to hang inspiration. These tiny canvases were two of the activities the kids tried at Art Break. (You can also see how I store my serger thread. This might be my favorite part of the whole peg board.)

Last, but not least, I have these treasures. My mom found this skirt hem marker at an antique shop. The thread holder is one my great grandfather Pop made. He was an incredible whittler and woodworker during his long 101-year life. (Remind me to show you the quilt that his wife, his daughter (my grandma), and his granddaughter (my mom) made together with me sitting close by. )
I also have plenty of other sewing necessities in my little nook: my books on the shelf, my dress form, Grandma and Grandpa’s old chalk board (thanks Uncle D.!), my cutting mat that slips right behind the table, and a basket full of immediate projects. That reminds me, I have lots to do.
Thanks for stopping by!

Book Review: The Vogue and Butterick Step-byStep Guide to Sewing Techniques

The Vogue/Butterick Step-by-Step Guide to Sewing Techniques
by the editors of Vogue and Butterick Patterns
Published in 1989
ISBN: 0-13-944125-5

Some Chapter Headings:

  • Applique
  • Bindings
  • Collars
  • Facings
  • Gussets
  • Linings
  • Overlock
  • Shoulder Pads
  • Yokes

I liked:

  • The quick, easy-to-use format. They certainly don’t waste any words. The only text not in a tutorial is the opening page, where the book is explained.
  • Opening any one of the 47 sections to find well-illustrated instructions on sewing techniques.
  • The “Binding” section. It starts with a quick tutorial on making your own binding strips and then covers those icky situations like turning corners and neatly joining binding.
  • The information in the “Layout” section that covers cutting plaids and stripes. It includes gentle reminders like, “Avoid placing a heavy, dominant horizontal stripe at the bust line or waistline.” (page 209) Sounds like really good advice to me!
  • The “Pocket” section. I wish I’d had that information the first time I tried to make a self-faced pocket. The illustrations are very clear.
  • That this book even includes a section on “Shoulder Pads”. Should they ever come back into high fashion, I’ll know just where to turn!

My dislikes:

  • The “Lining” section
  • No “invisible zipper” reference
  • The entire book is dedicated to garment sewing. Sure some techniques could cross-over into home decorating, but all the examples illustrated are garments.

Conclusion:
At first glance, this was one I wanted to put back on the shelf. But, as our local branch of the library has such a limited selection, I figured I better at least have a second look. I’m so glad I did!

This book is one to have on your shelf if you are moving toward an advanced beginner and intermediate sewing level. Not every sewer has mastered every technique, so having a quick, well-illustrated guide is quite handy. While I had the book for 2 weeks, I managed to use the sections on:
Binding
Buttonholes
Collars
Edge Finishes
Gussets
Hand Sewing
Layouts
Pressing
Vents

Would I buy it for myself? I have it “Saved for Later” on my favorite book-buying site. But, I’ll probably pass. At least, as long as I can find it on the shelf at the library.

Would I buy it for a beginner sewer? Maybe. This is definitely a great addition to the library of an advanced beginner.