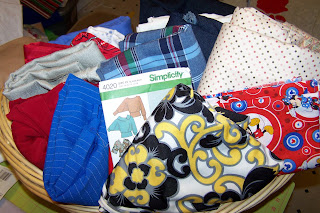
Well, it’s mid-way through the month and I decided to check the progress in my sewing basket:
PJ pants featuring a certain mouse for John, just because
Ahoy! A Spring Wardrobe (reds, whites and blues)
Fostering creativity through sewing and other hobbies
Well, it’s mid-way through the month and I decided to check the progress in my sewing basket:
I don’t have much new to show you, but I wanted to take the time to reply to a few comments and say hi.
First the “Hi’s!”:
Now to the Comments:
From Kristine on January 4: That’s so sweet! Love the monogram! What pattern did you use?
Thanks Kristine. I use a pattern that is a Frankenstein of sorts. I started with the pattern in the Martha Pullen Applique book, then lengthened the legs. Then, I found that the size 2 in her book runs WAAAAY small, so I adjusted it to the measurements of a McCalls OOP pattern.
From Marci on January 6: Great little book!
I knew you’d love it my Arkansas friend!
From Michelle on January 6: One of my new year’s resolutions is to sew every day. Yesterday all I managed was washing the fabric I am planning on using. I have yet to sew a single stitch! Hoping today is the day…
Personally, I think washing is part of sewing, so you’ve already had a successful year!
From Sister #3 on January 6: What about that certain belated Christmas gift????

‘Nuff said!


Robe: McCalls 5019, View B

Nightgown: McCalls 5775, View C (lengthened 2 inches)
I promise to get reviews up on PR soon, but until I do, both patterns were well worth the 99 cents I paid for them.
I have a favorite pants pattern. It is an elastic waist pull-on pant that makes up beautifully in linen. The only problem: they have not pocket. So,  I added one!
I traced my hand so I would know about how wide I needed it to be.
I drew a slanted tear drop around my hand.
I added 5/8 inch seam allowances around it.
I taped the pocket to my pattern tissue, matching the side seam lines and cut out my pants. (You should note that this took about an extra 1/2 yard and had much wasted fabric.)
I stitched a piece of ribbon along the seam allowances on the front of each pocket for  support. (At this point I referred to a handy sewing guide. Look for a review of the Reader’s Digest New Complete Guide to Sewing coming soon.)
I basted the pocket opening closed along the seam allowance.
I stitched the pants leg together from the hem up to the waist, following the curve of the pocket.
I clipped the corners at the pockets and finished the raw edges. I removed the basting and “bingo!” I’ve got pockets!
The first is one of several super-easy, super cute bags I did for some little friends. The bags are from Hobby Lobby. I just free-handed an initial, stitched it on, stitched on some ribbon and that’s it. 
This next one was a special request-or rather a strongly worded hint. Here’s the email from Sister #3:
Also, I would like a gym bag – not the athletic looking kind, but a small bag (fabric or canvas?) for my cycle shoes and seat (yeah I’m hard core!). And if someone had time and was so inclined it could be monogrammed with my initials. I just realized that I have nothing monogrammed with my new – ok, almost 4 year old – initials. (This was directed at Sister # 1 -ME!)
Good luck 🙂
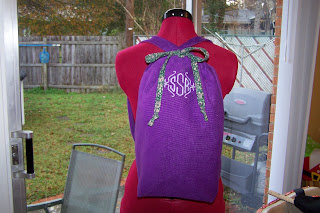
So, I set off with no pattern, no idea how large cycle shoes or a seat are(Apparently, personal seats are fairly common to those who enjoy spinning classes), and no real plan to create said bag. This is what I came up with:

I raided my stash to find a purple cord and coordinating purple and green flannel. I figured these fabrics would wash and wear nicely and keep their shape well, without giving her the “gym bag” look. I made a basic lined bag (the lining is the flannel) and then I folded down a casing. I put button holes in the front of the casing for the drawstring. The drawstring is from the flannel.
And, of course, it’s monogrammed. I actually monogrammed the cord before I put the bag together.
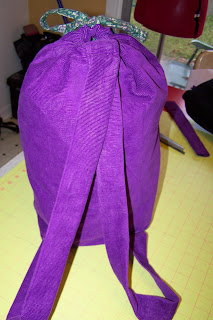
Rather than traditional shoulder straps, I attached the straps as if for a back pack. Here you can see the back. 
I didn’t get the final measurements, but I’m guessing the bag is about 22 inches tall and 15 wides, because the rectangles I started with were about 1 inch larger than that.
I have one more delightful bag to show you, but it must wait. We aren’t opening those gifts until tonight.
I hope you had a wonderful Christmas day!
–Edited on 12-29-08 to change the picture size.
We interrupt this Christmas season to bring you…LIFE.
That’s right, all the decorations, crafting, sewing and baking were put on hold when we had a few tough days. But all that’s behind us and there’ll be a few fun posts coming soon.