Just a quick note to say that I haven’t fallen off the face of the Earth. I’m sewing and carpooling and cooking and all those things. And, joy of joys, it seems I have more time for all of them as my dumb cable company can’t get out till Friday to fix a problem with their lines and my internet connection. Yuck! Anyway, I’ll be back…
Category Archives: Being Creative
Fostering creativity through sewing and other hobbies
5 Cool Sewing Tips
Here are my 5 favorite sewing tips (for today anyway, because tomorrow I’ll probably learn something new):
- Wet the back of your needle before trying to thread it. The surface tension from the water pulls the thread right on through.
- Compare your pattern pieces to a RTW piece that has a similar fit. This is particularly helpful if you’re fitting a difficult client (like my hubby).
- Instead of chalk, mark your notches, darts, etc. with a dried-up remnemt of Ivory soap.
- Put a shirt together at one shoulder (or if it has raglan sleeves–at 3 seams). While it’s flat, serge your neck binding (or cuffs onto sleeves) on the neck line. (I find it easiest to place if I’ve notched center front, shoulders and center back on both the shirt and the ribbing.) Then serge the remaining shoulder seam, all the way up the ribbing.
- Choose your pattern size based on your front width measurement (FWM). This is a great N. Zieman tip. To take the measurement, find the crease in your skin where your arms meet your body and measure straight acros your chest. Round off to the nearest half-inch. A FWM of 14 inches corresponds to a size 14 and every 1/2 inch difference is a pattern size. (I.e., 13.5 inches = size 12, 13 inches = size 10, 14.5 inches = size 16, 15 inches = size 18)
So, those are mine. What are yours (and no, Jane, “If you can’t find it, just call Salinda and she’ll make it.” doesn’t actually count as a tip. 🙂 )
Catching Up…


 The kids went back to school on the Thursday of that week, but it was almost like starting the year all over again. It was a wild and wacky week, but our Gustav experience was most definitely memorable!


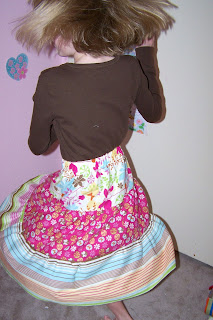
And yes, the skirt really twirls!
So, that catches you up to date on our lives! We are blessed that our family and friends and their respective homes are safe. We are even more blessed that God timing was perfect and Nita was here (a half-mile from the hospital) when she became ill. What a week–or 2!
Book Review: 10, 20, 30 Minutes to Sew
by Nancy Zieman
Published in 1992
ISBN: 0-8487-1118-1
Some Chapter Headings:
Minutes to Organize
Fast Fashion Elements
Serging, the Ultimate Time Saver
Super-Quick Knits
Elastics–Fast and Fun to Sew
Needle Know-How and Feet Smarts
Begin to Sew
I liked:
- The idea that I don’t have to spend a whole day to do some worthwhile sewing.
- The tip about using a recipe card file to keep track of alterations for yourself and others you sew for.
- That she writes out this tip (I knew this, but I’m not sure how I knew it, so seeing it in writing was reassuring that I was doing it correctly): “When you are sewing together 2 fabric pieces of different lengths, stitch with the longer layer down (next to the feed dogs of the sewing machine) and the shorter layer up (next to the presser foot). The feed dogs will gently and evenly ease the longer layer to meet the shorter layer.” (page 25)
- The great introduction to a serger.
- The “Seams Great Elastic Casing” ( I wish I’d used this on this dress.)
- Her “Favorite Gathering Method” (page 133) that uses a zig–zag stitch rather than 2 rows of basting stitches.
My dislikes:
- Some of the fashion ideas are a little dated.
- Her centered zipper instructions (pages 35-36) didn’t work for me.
Conclusion:
This book works to dispel the notion that “I have no time to sew”. As she points out in her introduction, so much of sewing is the prep and the pressing, rather then the actual time stitching a seam. With that in mind, it becomes easy to take a project and break down into smaller steps that fit much better into a crazy, busy lifestyle. On a side note, McCalls patterns are now offering some “10,20,30 to Sew” patterns that are supposed to have Zieman’s tips include in the instructions. I haven’t looked at them, but I’d be interested in knowing if they break the project down into smaller steps like the book suggests.
Would I buy it for myself?
I probably would have never chosen it for myself, simply because the book screams 1990! However, I grabbed it off Mom’s shelf on a lazy weekend at her house and discovered the tips. I still haven’t returned it. Oops!
Would I buy the book for a beginner?
I think a beginner could benefit from this book, particularly if she is having trouble finding the time to start and finish her new projects. Plus, the elastics and serger chapters are great for trying new techniques.
Book Review: Tailoring for Women
Some Chapter Headings:
Equipment and Supplies
Pressing Equipment
Fabric Preparation
Layout, Cutting and Marking
Constructing the Skirt
Style Variations and Construction Hints
I liked:
- The great introduction that includes how-to’s for Hand Stitches.
- An excellent measurement table to help you get started fitting.
- Instructions on creating the pressing tools you’ll need.
- A great pattern alteration chapter.
- After a lengthy technical section on the basic jacket or coat, following chapters give you the modifications in constructions for other styles.
My dislikes:
- There are no photographs. All the images are line drawings.
- The pages are not “pretty” and very easy to get lost in, unless you are following along while working on a project.
Conclusion:
If you’ve read many of my “reviews”, you’ve probably picked up on a couple of things. 1.) I love these older books. They have instruction and details that I just haven’t found expressed so beautifully in today’s books. 2.) I think hand stitches are a lost art and I’m always looking for tips to improve mine. 3.) Fitting is critical. Pressing is a close 2nd.
This book contains all those things and more. I actually borrowed this one from my local library. It’s not pretty or flashy, but if you’re looking for instructions on underlining or bound buttonholes, you can find it here.
Would I buy this book for myself?
I do like this book. A lot. But, I don’t have any need to tailor anything for myself. If, and that’s a major if, I ever do, I will probably try to track this book down.
Would I buy this book for a beginning sewer?
Nope. It would bog them down. There are plenty of other vintage sewing books out there that would be much more appropriate.
Book Review: 101 Crafts Under $10
Some Chapter Headings:
Frames and Photos
Pillow Panache
Speedy Stitchery
Toys for Tots
The Craft Tool Kit
I liked:
- The idea that my thought and time add so value to $10 worth of supplies.
- The variety of ideas from paper crafts to painting to sewing to cooking.
My dislikes:
- This book encourages hoarding (like we crafters need any encouragement hanging on to things that “might be good for (insert your project here) someday.”
Conclusion:
Frankly, these type books are a dime a dozen. I find that this book and others like it are wonderful inspiration when you’ve hit a slump. These are also great sources of ideas for smaller gift giving, like teacher gifts, party favors, and hostess gifts.
Would I buy this book?
Probably not. In fact, this book, and others like it, are the reason I love the library. I don’t need an idea book often, and I don’t have room to keep them at my house. But, I know I can always find them in the library’s stacks (usually in the 640s.)
