Category Archives: Being Creative

Fostering creativity through sewing and other hobbies

The countdown is on and we’re getting our back to school routines ready!

Topher's First Day of school

Only 7 more days!  Seven!  And these babies will be in middle school and 3rd grade!

We’re spending the week taking care of a few last-minute chores: the dentist, haircuts, shoe shopping, Six Flags.  We are also trying to get our back to school routines up and running!  Yuckola.

I’ve researched and searched and fiddled and hemmed and hawed to find a housekeeping/organizational system that works for me.  Basically, I’ve discovered it comes down to one thing:  JUST DO IT!  There is no quick fix and there is no magic bullet to a clean, organized home, especially a small one with a home-sewing business and two busy kids!  We’ve developed a pretty good system for chores this summer and I’m hoping to keep it up for this school year.  Here’s how we are doing it.  For now.

Master calendar:

master calendar

I use Google calendar for keeping up with everything!  Every.Thing.  But, the kids can’t easily access it.  So, this giant fridge calendar is our fix.  Adam and I only list the things on the calendar that effect our whole family (this means evening events only).  The kids have a place to record school deadlines, practice times, and such.  I also list our dinner plans.  No more “What’s for supper?”  Woo hoo!

Morning chores:

morning rountine #2 morning rountine #1

These haven’t changed must over the years.  Get dressed, talk to God, make your bed, pick up your clothes, eat some breakfast, brush your teeth, and be ready for the day.

Everything else:

Daily Chores

I use Confident Mom’s Daily Planner to keep track of housekeeping chores.  I like it because it reminds me to do the simple things too, like wipe down the light switches or clean the crumb tray of the toaster.   I do have to remember to extend a little grace to myself when I miss something.

Daily:

daily schedule

I try to get a load of laundry washed and into the dryer and dinner thawing out before I do much else for the day. The rest of the school day is spent working.  I give myself 30 minutes during the school day to do a few chores and the rest happen around 8 at night.

The kids’ chores:

The kids are responsible for unloading and reloading the dishwasher, dumping the compost, and emptying the personal trash cans into the large kitchen trash.  In addition, I vacuum their rooms on Tuesday.  If I can’t for fear of vacuuming Legos, clothes on the floor, etc, then they lose TV until the next Tuesday.  Really, as they only watch TV on Friday nights, this isn’t a loss, but shhh….don’t tell them that!

So…that’s it.  That’s the routine we are in and the routine that I’m hoping we can stick to this fall!


Where have I been this summer?

Behind my sewing machine.  Almost everyday. 

First, let’s catch-up on everything I would/could/should have shared this summer if I’d just taken a moment to to stop and blog.  We’ve done all the usual summer fun:  mission trips and other church trips, camp, the blueberry farm, the farmer’s market, the La. Folk Festival, Summer League, State Long Course Swim Meet, VBS, golf camp, etc.  If you follow me on Instagram, you’ve probably seen all the pictures. 

And then there’s this:

I posted this one Saturday night on  FB:

June 8:  Market research please: what colors are your 5th, 6th, 7th grade girls loving right now? I’d really, really, really like to offer some custom pieces for our big girls that are flattering, trendy, modest, and age-appropriate, so I need to know what’d you think they’d like.


33 comments, 5 bolts of fabric, and 51 days later:


Ready, Set, Serge

serieslabel.jpg

So my sewing friends, are you feeling a little more comfortable with your serger?  If you’re just joining us, during the last few weeks, I’ve introduced a few tidbits to make your serger a little more user-friendly.  Here’s what we’ve covered so far:

Week 1:  the parts of your machine and how to thread it

Week 2:  Selecting needles and threads for your project

Week 3:  Balancing the tension on your machine

And now we serge!

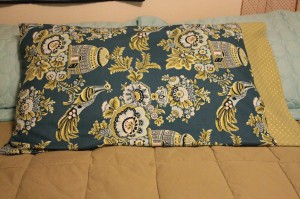
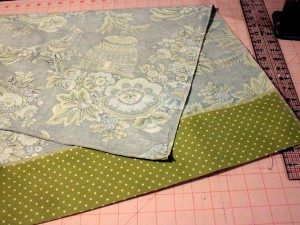
This basic pillowcase is a simple way to use all you’ve learned.  (This makes a standard pillowcase.)

IMG_7170

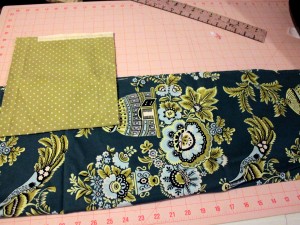
1.  Cut 2 rectangles:

  1. 9″ x WOF of contrast trim
  2. 27″ x WOF of main fabric.Pillowcase Step 1

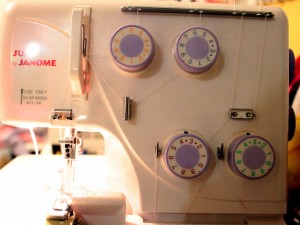
2.  Set your tension dials on your serger to match the settings that work best based on your tension maps.

Pillowcase Step 1A

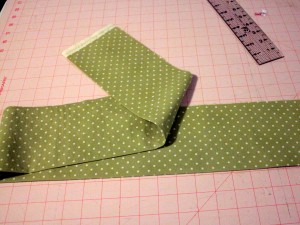
3.  Fold the contrast trim in half, lengthwise and press well.Pillowcase Step 2

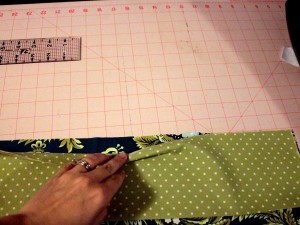
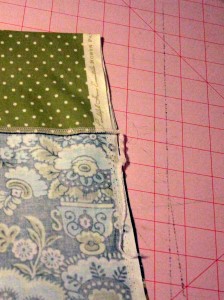
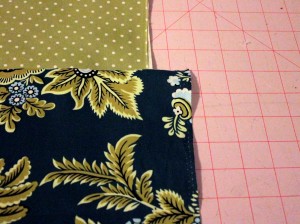
4.  Align the raw edges of the contrast trim and the main fabric, right sides together. Don’t worry if these two pieces of fabric aren’t the same width.  You can trim later.Pillowcase Step 3

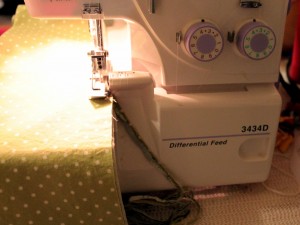
5.  Serge across these raw edges.

Pillowcase Step 4

Pillowcase Step 4A

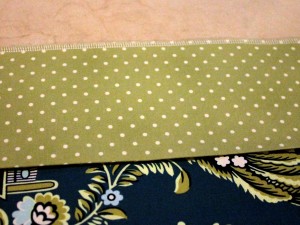
6.  Press open, pressing seam towards main fabric.

7.  Fold the pillowcase in half, wrong sides together, aligning raw edges.

Pillowcase Step 5B

Now’s the time to trim up any uneven edges.Pillowcase Step 5

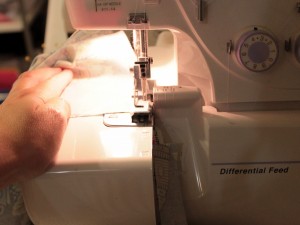
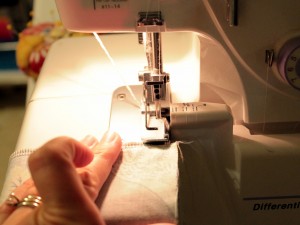
8.  Serge down the long edge of the pillowcase.  Serge from end to end.  (You can’t pivot a corner like on a sewing machine.)

IMG_7161

9.  Serge across the bottom edge of the pillowcase.  (Again, you can’t pivot, so after you finish the long edge, take the pillowcase off the machine and replace the short edge.)

IMG_7162

10.  Turn it right side out and enjoy!

IMG_7164

How’s that for a quick and easy project with your serger!


The Summer Count Down is On!!!

10 More School Days!!!

Back to School Breakfast Centerpiece

The countdown is on at our house!  I big news for both my customers and my sewing class students.  But first…

The kids have only 10 more school days to fit in 1 final day of book fair, 4 field trips, and 5th grade graduation!  It’s going to be a jam-packed 2 weeks to say the least!

IMG_20120821_073901_thumb.jpg

Speaking of summer, you can find your 4th of July jon jons in the Personality Children’s Clothes etsy shop.  I’ve also got sandcastles and fishing bobbers and sailboats and alligators all ready for summer!  Please remember that Friday, May 10 is the last day to ensure delivery by Memorial Day.

Summer Sibling Sets


Also, the summer sewing classes are filling up quickly!  I’ll be at LSUS, BPCC, and Lil’ Miss Priss.  I’m most excited about the Summer Kids’ Sewing Series I’ll be teaching at Lil’ Miss Priss.  You can learn more on the Needles, Nuts, and Bolts Facebook page.  You can find the rest of the summer schedule for 2013 on my sewing class page.


Needles, Threads, and Woolly What?

series label

This is my second installment in my serger series.  Today, it’s all about thread and needles!  (You can find information about threading your serger here.)

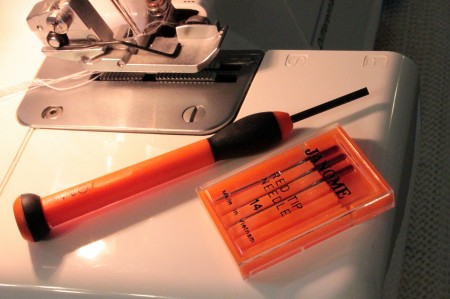
Let’s talk needles first.  Your serger manual will list the type of needles required for your machine.  My simple Janome Juno 3434d requires just basic sewing needles.  Others need a “serger” needle or a particular style.  Whatever brand or model you need, you’ll want to choose the appropriate size needle.  For a “regular” weight cotton like a gingham or those cute calicos from HL, you’ll need an 11.  For heavier work, like cord or denim or fleece, you’ll want a 14.  Basically, you choose the size of your needle based on your fabric choice.

IMG_6147

Now for threads.  Your serger will need 4 spools of thread.  That’s a lot, but there is good new.  In most pieces, you’ll only see the left needle thread.  That means that the other three threads don’t have to match, only blend.  I have found that I really only need a few colors for all my projects:  dark grey, red, royal blue, white, and khaki.


IMG_6148


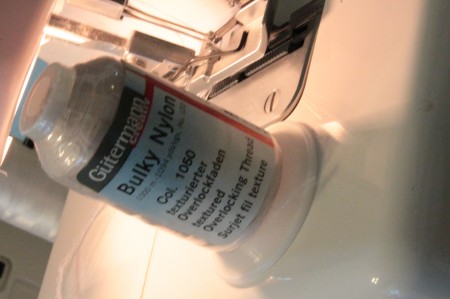
I will sometimes use Woolly Nylon in my looper threads (those two spools on the right).  Woolly Nylon is a name brand, so you might see it as Bulky Nylon.  I find that this thread is a little more difficult to thread through a needle, but I love the finish it gives my garments.

Load up your machine with some thread and give it a go.  Which do you prefer?  Serger thread on all or the Woolly Nylon?  If you’re having trouble making an even, balanced stitch, no worries!  We’ll talk tension next week.


Loopers? Flatlocking? What?

A serger is a wonderfully helpful, time-saving machine—if you aren’t afraid to use it!  Over the next few Tuesdays, I hope to share a few serger tidbits that can take the intimidation out of this sewing room essential.

series label

So who needs a serger?  We’ll anyone who sews on a regular basis.  I’m not talking about your friend who only uses her sewing machine every other Spring to hem pants.  I’m talking about you—the hobby seamstress who loves making pillows and napkins and curtains and clothes.  I’m talking about the hobby seamstress who wants to take her hand-made gifts to the next level.

Why do you need a serger?  Well, for starters, a serger allows you to complete your sewn pieces with a professional finish.  A 4-thread serger can also stitch and overlock the edges at the same time, saving you some time.  A serger stitches so much more quickly than your sewing machine.

So…you already have a serger?  Great.  Go get it out of the box and set it up.  Does it look kinda like this?

IMG_6121

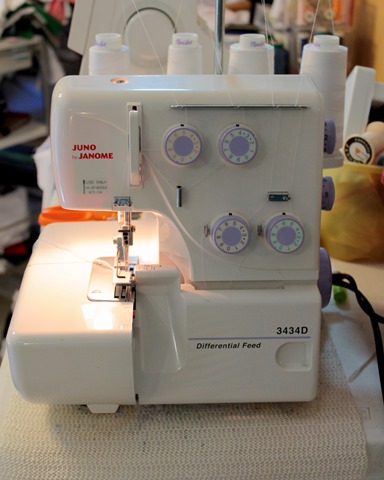
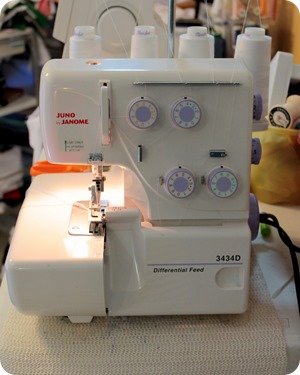
My machine is a Janome Juno 3434d.  It’s on the less expensive end of the serger spectrum.  It doesn’t chainstitch or coverstitch.  It also doesn’t have the air-threading that the Babylocks have.  It does have all metal parts and can gather, blind hem, flatlock, and, of course, do a fabulous overcast.  This little machine, in my opinion, is perfect for the home seamstress.

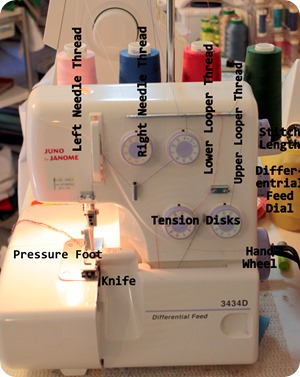
There are a few parts you need to know on your machine.  I’ve labeled them below.

IMG_6105

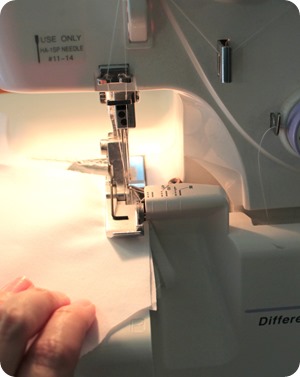
To use a serger, you just place your fabric under your presser foot and sew:IMG_6130

One major difference is that the knife trims off excess seam allowance before the stitches are made.  You’ll want to avoid using pins for this very reason.


IMG_6149


There are two ways to thread a serger, if you don’t have one of the fancy air-threading machines:  from scratch or tying off. 

IMG_6108

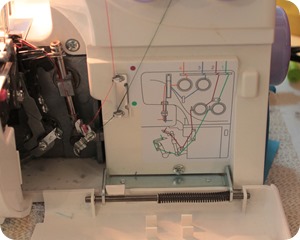
To thread from scratch, follow the instructions in your manual.  The diagrams are probably also on your machine.  You MUST start by threading the upper looper and then the lower looper.  Then you can thread the right needle and then the left needle.  I’m not going to lie.  This method can be a bit more tedious, but it is possible.  A pair of tweezers will make the job easier. 

If your machine is already threaded, tying off is the easiest way to go.  To tie off:

1.  Clip the needle threads just above the eye of the needle.

2.  Hold the existing chain and sew until the chain consists of only 2 threads.  (These are remaining threads your looper threads.)

3.  Cut the looper threads near the thread spools.  Replace the spools with your new threads.  Tie threads from your new spools to the existing threads with overhand knots.

4.  Turn your looper threads tension dials to 0.  (Write down the original setting so you can go back to it.)

5.  Gently pull the upper looper thread behind and to the left of the needle until the knot is behind the needle.  Repeat for the lower looper thread.

6.  Replace the two thread spools for the needle threads and rethread the needles. 

7.  Return your tension dials to the original settings.  Hold all the threads together behind the machine and sew pulling the thread chain.


Well, how’d you do?  Is your machine threaded?  Great.  Next week, I’ll talk about threads and needles and such.

series label

Week 1:  The parts of your machine and how to thread it

Week 2:  Selecting needles and threads for your project

Week 3:  Balancing the tension on your machine

Week 4:  A serged pillowcase

Week 5:  Hemming with your serger

Week 6:  Gathers and elastics

Week 7:  A ruffled pillowcase