Category Archives: Everything Else

On more glance at the Christmas tree…

It’s almost time to take the tree down. We will wait until next weekend to take down all the Christmas–and pull out some Mardi Gras! But until then, here are a few of the ornaments we’ve added this Holiday season:
Of course each has its own story.
The candy cane: The LM came home from school with a plain ol’ candy cane and said, “Mrs. Claus came to my class today and gave me this to put on the tree so Santa would know I listened good.” So we did.
The carousel: The kids and I took a weekend jaunt to New Orleans with my parents. We had a blast at Christmas in the Oaks and rode a carousel that went on and on and on and on… The best part of the entire trip–we were walking through “The Miracle on Fulton Street” when the LM saw a man (in regular clothes) with long white hair. As we walked past the man, LM looked backwards, with his chin on the ground, to see the man also had wire-rimmed glasses, rosy cheeks, a rounded belly, and a long white beard. Then, with his wife giggling beside him, the gentleman leaned down to LM and handed him a candy cane with a wink. I don’t know who was more excited to see the real Santa–LM, me, or my Dad!
The red bell: My grandmother gave this to me this year. My Dad made it back in his cub scout days.
The blue ball: Mrs. Lary sent these home with sweet fingerprint snowmen decorating them.
Somehow, I’ve misplaced the pictures of the ornaments from Great-Grandma, but she gave us 3 beautiful ones also.

More Unwrapped Christmas

This is my favorite Hand-Made Christmas gift:


My nephew Charlie is 1 and I was at a complete loss for his Christmas. Then, Mom handed me this great train-track panel from her stash. I lined the back with black fleece and stitched on a pocket to create a train-in-a-bag set. All his mommy has to do is:

fold the bag in thirds,

roll it up,

and turn it right side out!

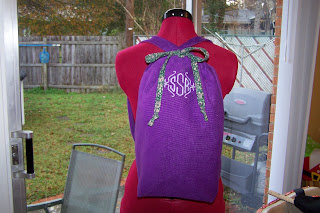
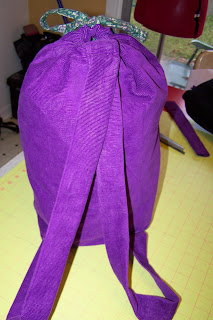
And–and made the pocket with an extra pleat so it would open the bag up and make room to store his new train!

Unwrapped sewing

Now that we’ve opened all the gifts, I can show you a few projects I made this year.

The first is one of several super-easy, super cute bags I did for some little friends. The bags are from Hobby Lobby. I just free-handed an initial, stitched it on, stitched on some ribbon and that’s it.
This next one was a special request-or rather a strongly worded hint. Here’s the email from Sister #3:

  • If anyone still needs a Christmas idea for me – I would like a little clock for my bathroom. Not a wall clock, but a pretty little stand up one that I can put on the towel shelves and maybe make it to work on time. (This was directed at Sister #2)

    Also, I would like a gym bag – not the athletic looking kind, but a small bag (fabric or canvas?) for my cycle shoes and seat (yeah I’m hard core!). And if someone had time and was so inclined it could be monogrammed with my initials. I just realized that I have nothing monogrammed with my new – ok, almost 4 year old – initials. (This was directed at Sister # 1 -ME!)

    Good luck 🙂

So, I set off with no pattern, no idea how large cycle shoes or a seat are(Apparently, personal seats are fairly common to those who enjoy spinning classes), and no real plan to create said bag. This is what I came up with:

I raided my stash to find a purple cord and coordinating purple and green flannel. I figured these fabrics would wash and wear nicely and keep their shape well, without giving her the “gym bag” look. I made a basic lined bag (the lining is the flannel) and then I folded down a casing. I put button holes in the front of the casing for the drawstring. The drawstring is from the flannel.

And, of course, it’s monogrammed. I actually monogrammed the cord before I put the bag together.

Rather than traditional shoulder straps, I attached the straps as if for a back pack. Here you can see the back.

I didn’t get the final measurements, but I’m guessing the bag is about 22 inches tall and 15 wides, because the rectangles I started with were about 1 inch larger than that.

I have one more delightful bag to show you, but it must wait. We aren’t opening those gifts until tonight.

I hope you had a wonderful Christmas day!

Edited on 12-29-08 to change the picture size.

Merry Christmas!

I love Christmas for so many reasons:
  • I love the lights and sounds.
  • I love the smells of yummies baking in the kitchen.
  • I love the joyous laughter I hear in children.
  • I’ll even admit that I love the shopping.
  • Most of all, I love the promise of Christmas–the promise that God fulfilled when He sent His only Son into this world to be born.

Jesus Christ’s birth changed the world over 2000 years ago, and it changes it still today. If you haven’t lately, read Luke 2 again. Then, turn to John 3:16 and remember why it matters!

Merry Christmas!

Our Christmas Traditions

What is your family’s favorite Christmas tradition?
We have several, but here’s a hint to one:
Yep, you guessed it. I’m in the kitchen ALOT, but at Christmas the baking and candy-making seems to turn up a notch!
Recently, I had the opportunity to share a little bit about our family’s traditions with my new friend Karen. I sent her this cute apron, a new recipe book with a few of our favorite Christmas recipes, and some homemade marshmallows. Here’s my marshmallow recipe. It’s yummy!
  • Prepare a 9 x 13 x 2 inch pan by lining it with aluminum foil and greasing the foil with Vegetable shortening.
  • Put 1/2 cup cold water in the large bowl of your stand mixer.
  • Sprinkle 3 envelopes (3 tbsp.) unflavored gelatin over the water and let it sit.
  • Place 2 cups granulated sugar, 3/4 cup light corn syrup, 1/4 tsp salt, and 1/2 cup cold water in a 2 quart saucepan over med-low heat.
  • Stir until the sugar is dissolved and the mixture is boiling.
  • Cover the pan for 3 minutes.
  • Uncover and raise the temperature to high. Insert a candy thermometer and let the syrup cook until 240 degrees. Do not over cook.
  • Remove from the heat.
  • While your mixer is beating at medium speed, pour the syrup slowly into the gelatin mixture.
  • After all the syrup is added, turn your mixer to high and beat for 10-15 minutes until the mixture is lukewarm, white and a whipped consistency. Add 1 1/2 tsp vanilla extract towards the end of the beating. You will also need to scrape the bowl occasionally. (My big Kitchenaid doesn’t take quite 10 minutes. Something less powerful–I don’t know.)
  • Pour the mixture into your prepared pan and smooth. (It is super sticky-so be prepared!)
  • Let the marshmallow stand uncovered at room temp for about 12 hours. I usually leave mine overnight.
  • Sift powdered sugar over your cutting surface.
  • Invert your marshmallow over the sugar and remove the foil.
  • Sift powdered sugar over the top of the marshmallow.
  • Cut the marshmallow into 1 inch cubes using a long, sharp knife. It helps if you grease the knife first. After the first cut, keep the blade covered in powdered sugar.
  • Roll each side of the marshmallow in powdered sugar to coat.
  • Store these in an airtight container.
Enjoy!

The Stockings Were Hung By the Chimney with Care

By special request:

2 new Christmas stockings for 2 very special boys. Hope you like them Jane!

For those of you who would ask: No, I didn’t use a pattern. I traced my own stocking and added a seam allowance. The stockings are crepe-backed satin with a micro-suede cuff. They are lined with a green/navy plaid taffeta. The star is free handed and machine appliqued. The trickiest part–I couldn’t use fusible interfacing for the applique because it doesn’t seem to work with lame’. Instead, I scotch-taped the star in place and removed the tape as I got to each arm of the star.