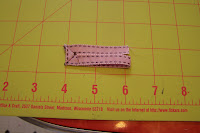
Here is a close-up of the button hole trim around the buttons on my pink jacket:

Here’s how I did it:
- Cut 7 inches of ribbon for a 2-inch trim.

- Fold over 2 1/4 inches.

- Mark the 45 degree line.

- I sew this on freezer paper because my ribbon often gets bunched under my presser foot. It will also help if you will lower your presser foot first–then your needle!


- Trim the corner.
- Press it open.

- Fold over 3/4 inches.

- Mark the 45 degree line and stitch again.
- Fold the remaining length back onto the length of top. Mark the 45 degree line and stitch again.

- Mark the intersection of the miters.
- Fold the top onto the bottom, matching the intersection.

- Mark 45 degree line.
- Stitch.
- Trim the excess.
- Press it open.

- Fray check your edges and stabilize if you wish. If you stabilize, you will have to rip the stabilizer between the ribbons.

- Secure it to over your button holes, matching openings.


really, really cute. What a great idea.
Nice touch!