Well, I’ve done it! I’m finished. And just in the nick of time. Top 10 things I learned (or was reminded of that I already knew):
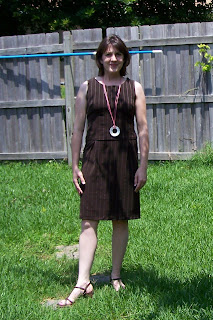
Simplicity 3631 made a great jumper. Here’s what I did:

- I made my lining as my muslin.
- I altered my pattern pieces.
- I made up the lining/muslin bodice according to my newly altered patterns. I also used the skirt pieces and basted the skirt onto my lining/muslin, just to be sure.
- I found that my armholes gaped and that the waist was indeed too long.
- Folded out an inch of length just above the waist. You can see this in the image to the left.
- I made a sloped shoulder adjustment per page 48 in my book.
- This fit nicely, so I took the whole thing apart, adjusted my tissue pattern again, and cut my garment.
- I put the garment together following the instructions, which I found quite easy to follow.
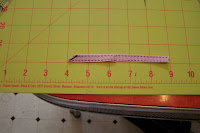
- I ventured from the instructions in step number 13 where it appears they treated the lining and garment as one during the installation process. This gave me very poor results, so I ripped it out and inserted the zipper into the garment only. Then I folded under the lining and tacked it in place. Just FYI, I have been using the lapped zipper technique published in the December 2007/January 2008 Threads magazine with great success. (Upper left image.)
- I finished the garment as instructed.
- I added bra strap carriers in the same ribbon used throughout my mini-wardrobe pieces.
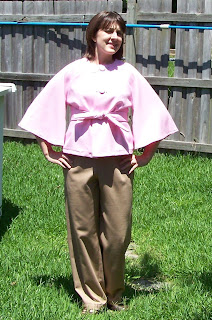
Simplicity 3631 also had a fun jacket:

For this jacket, I made it straight by the pattern. The only exceptions: 
1. I did my darts on the inside. A little less fussy that way.
2. I wasn’t happy with my button holes, so I hid them in ribbon. I took lots of good pictures of this, so look for a tutorial posted during the next week. Here is the ribbon I used. I also used it as an accent throughout my wardrobe.
Here’s another shot of that jacket.

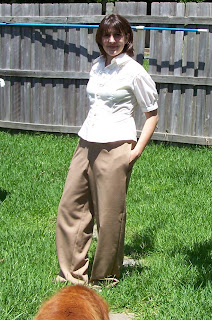
McCalls 5426 Princess Seam Top

You’ll have to excuse my photographic assistant in the bottom of this picture. Rex couldn’t stay out of the way!
This is a McCall’s “Made for You” pattern that includes different pattern pieces for AB/C/D cup sizes. I made view C and I did not have to make a FBA. I did shorten the length as usual. I followed the instructions without problems, but I wouldn’t recommend this pattern to a beginner because it lacks the friendly little reminders to clip curves, press seams etc.  I would also note that the construction order is strange to me, but I followed it and it worked out fine. There is a LOT of topstitching in the pattern.
BTW, I used a Kona Cotton. It will wrinkle a little, but when I first washed the piece, it came out of the dryer quite nice, so I’m hoping…
Here’s another image of the shirt under my jumper.
Hot Patterns Sugar Babe Set pants! (These are seen in 2 of the images above.)
You already know I love these pants. I now have 4 pair! My only complaint–they don’t have a pocket! So,  I added one!
I traced my hand so I would know about how wide I needed it to be.
I drew a slanted tear drop around my hand.
I added 5/8 inch seam allowances around it.
I taped the pocket to my pattern tissue, matching the side seam lines and cut out my pants. (You should note that this took about an extra 1/2 yard and had much wasted fabric.)
I stitched a piece of ribbon along the seam allowances on the front of each pocket for  support. (At this point I referred to a handy sewing guide. Look for a review of the Reader’s Digest New Complete Guide to Sewing coming soon.)
I basted the pocket opening closed along the seam allowance.
I stitched the pants leg together from the hem up to the waist, following the curve of the pocket.
I clipped the corners at the pockets and finished the raw edges. I removed the basting and “bingo!” I’ve got pockets!


I love the jumper/dress in this pattern too and have made it twice! I also made the jacket but used the slimmer sleeves. I love the colors in your wardrobe and how you made the pattern work for you!!!