Ready to make a skirt that fits you beautifully? Let’s get started. You’ll need your measurements, some freezer paper or tissue paper, and a ruler. A dressmakers’ curve would also be helpful, but it’s not totally necessary.
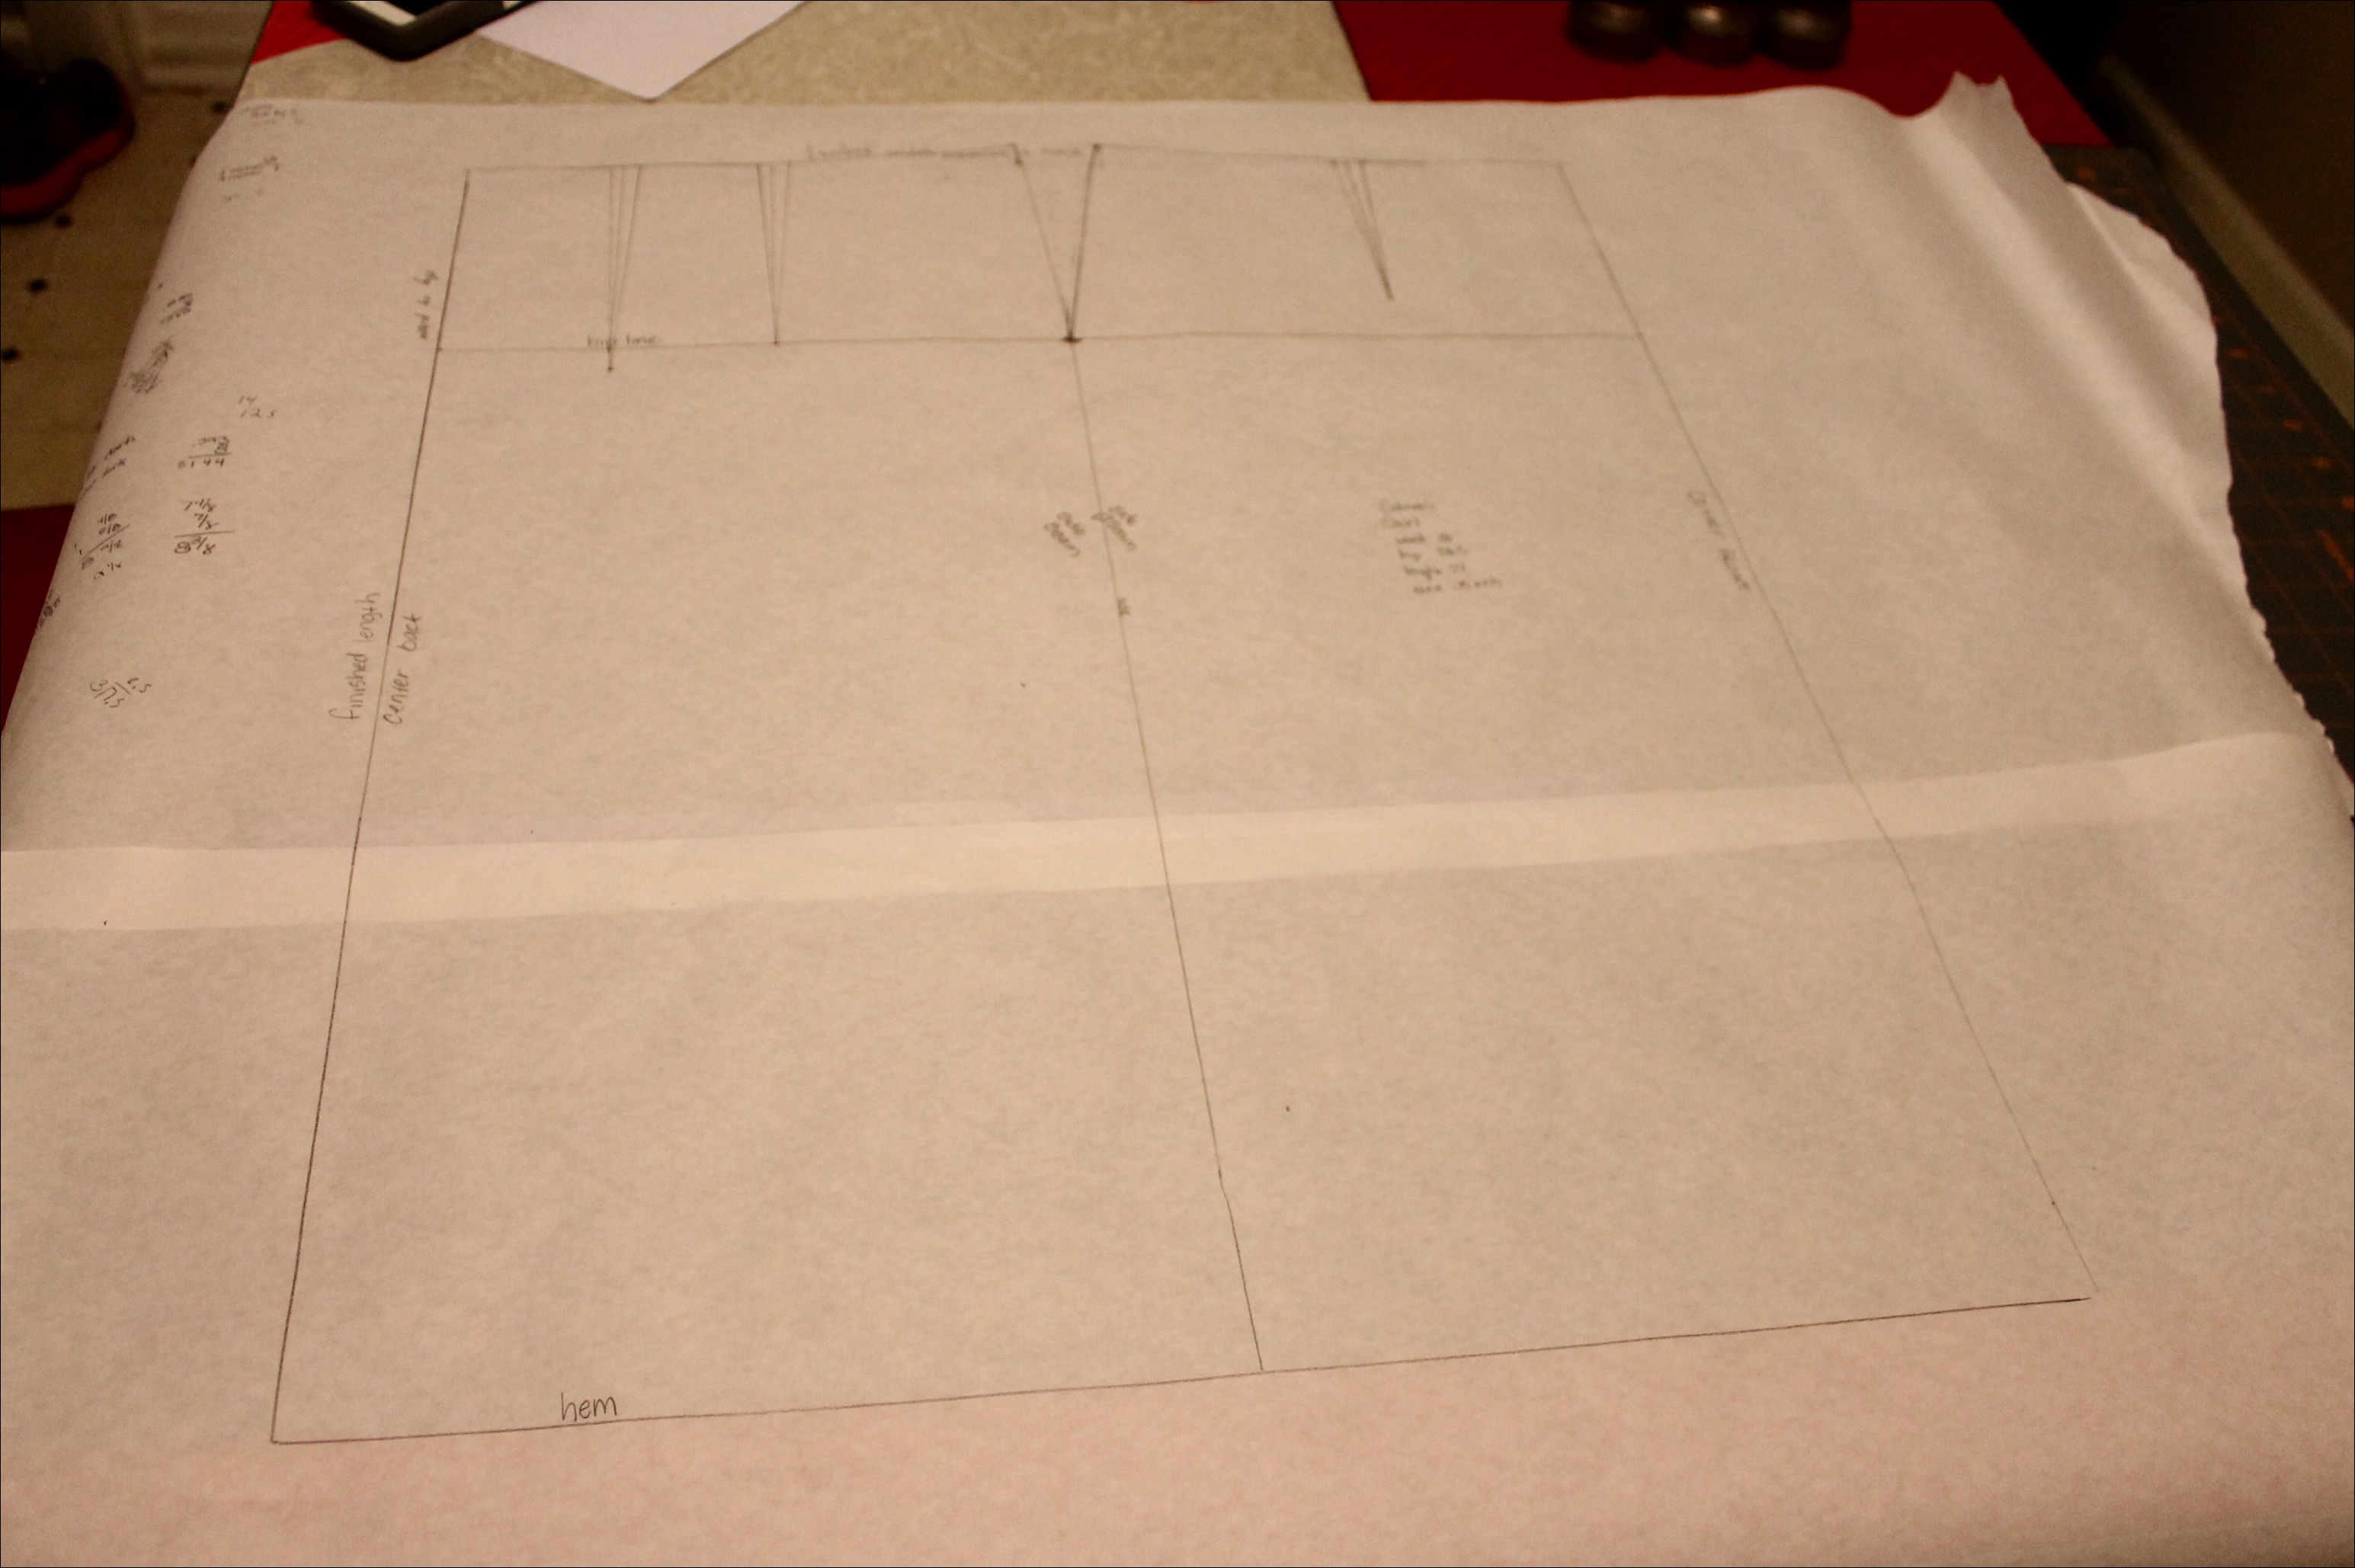
Here’s my sloper. I use two pieces of freezer paper taped together for the width.
So here’s how you do it:
1. Draw a rectangle. The rectangle should be as long as your waist to hem measurement and as wide as 1/2 your widest width.
2. Draw a line from top to bottom down the center of your rectangle. Draw a second line across your rectangle at your hip measure. This line should be down from the top the distance of your waist to hip measurement.
3. Now we are going to start drawing the waist. Divide your waist measurement by 4. Add 1 5/8 inch to this measurement. Make a mark that distance from the LEFT edge along the top. Draw a small line up 5/8 inch up from there. Now, add 7/8 inch to 1/4 your waist measure. Make a mark that distance from the RIGHT edge along the top. Draw another small line up 5/8 inch from that point.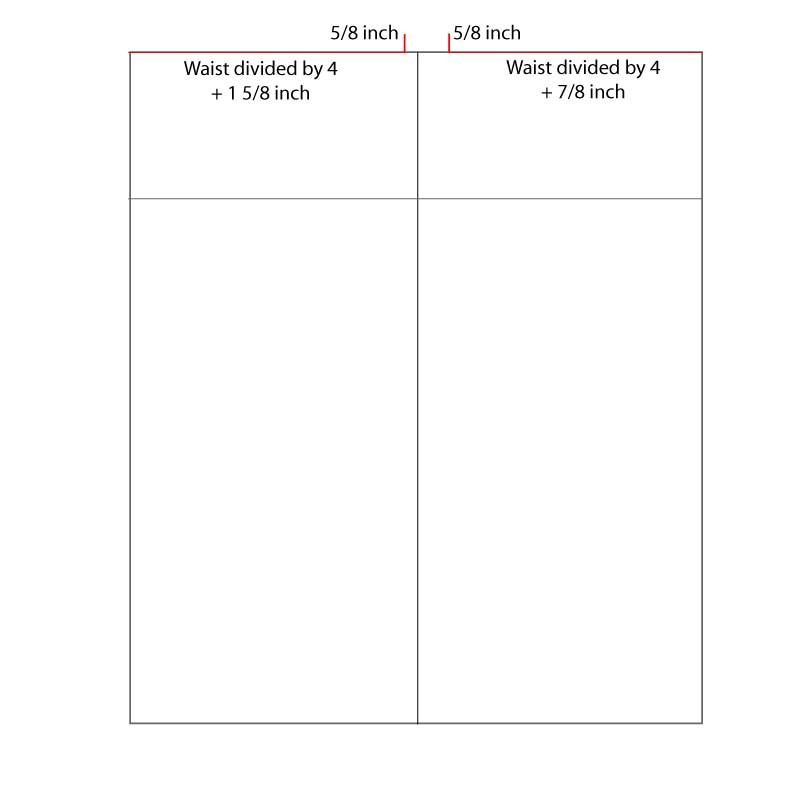
4. Now we need to create our waist curve using these new lines. Draw a curving line from the center of each narrow rectangle to connect with the top of the small line you drew up from the waist line. A dressmaker’s curve will help, but if you don’t have one, just do your best.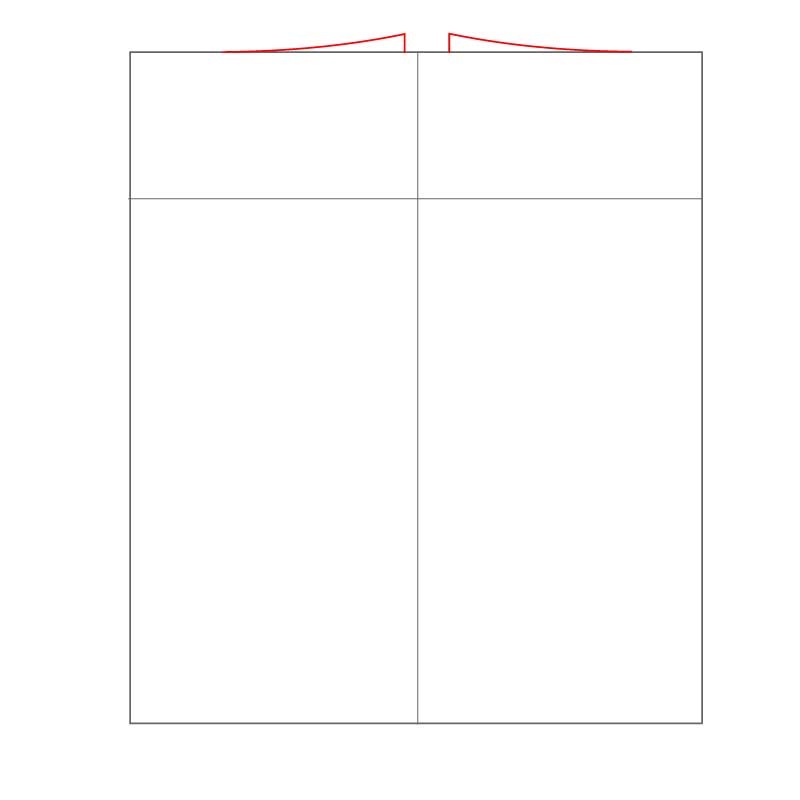
5. Time to connect your waist to your hips. Your waist to hip line may have more curve than mine. That’s fine if it does. That’s why we are making our own personal skirt pattern. To do this, draw a slightly curved line from the top of your waistline to your hip point (where your hip line intersects your midline). Mine is almost straight because my waist is not a whole lot smaller than my hips. Yours may be.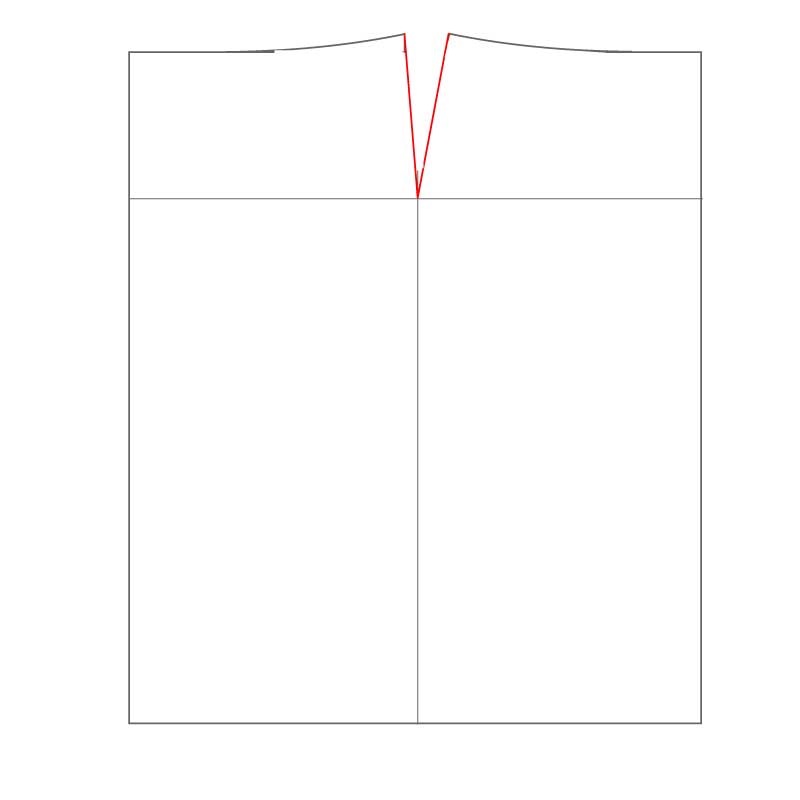
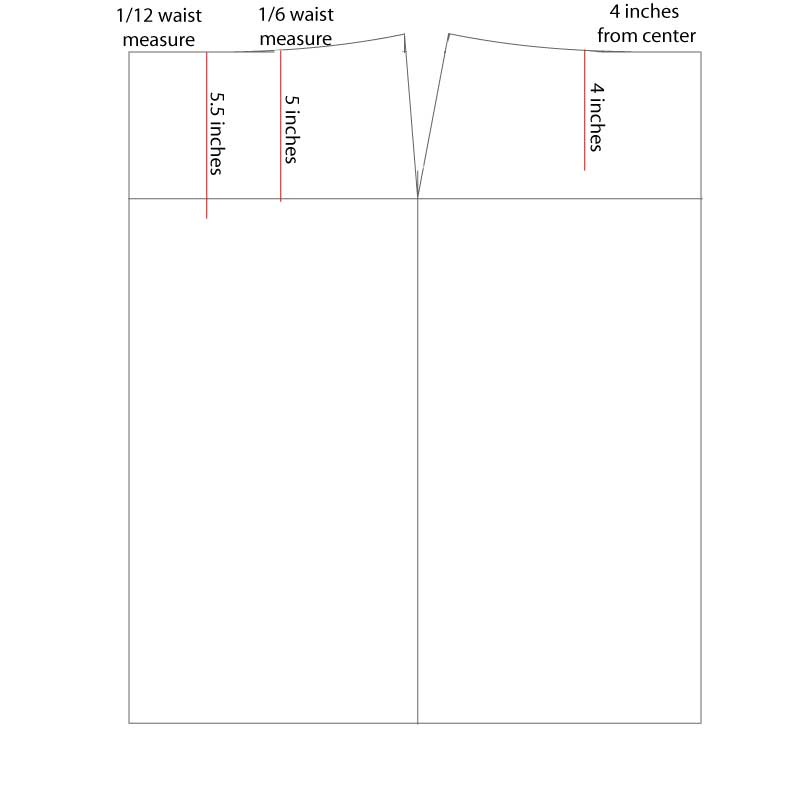
6. Time to draw the darts. The darts are how this flat piece will fit our curves. Let’s work on the darts on the left first. Divide your waist measurement by 12. Measure in this distance from the left edge. Draw a line 5.5 inches down from this point. For the second back dart, divide your waist measurement by 6. Draw a line 5 inches down from this point. Now for the front darts. Draw a line 4 inches down, 4 inches from the right edge.
7. Now to make these lines into darts, just draw triangles. The base of each triangle is 5/8 inch wide and is centered over your dart line. The base is along your waistline and the point of the triangle should touch the bottom of your dart line. 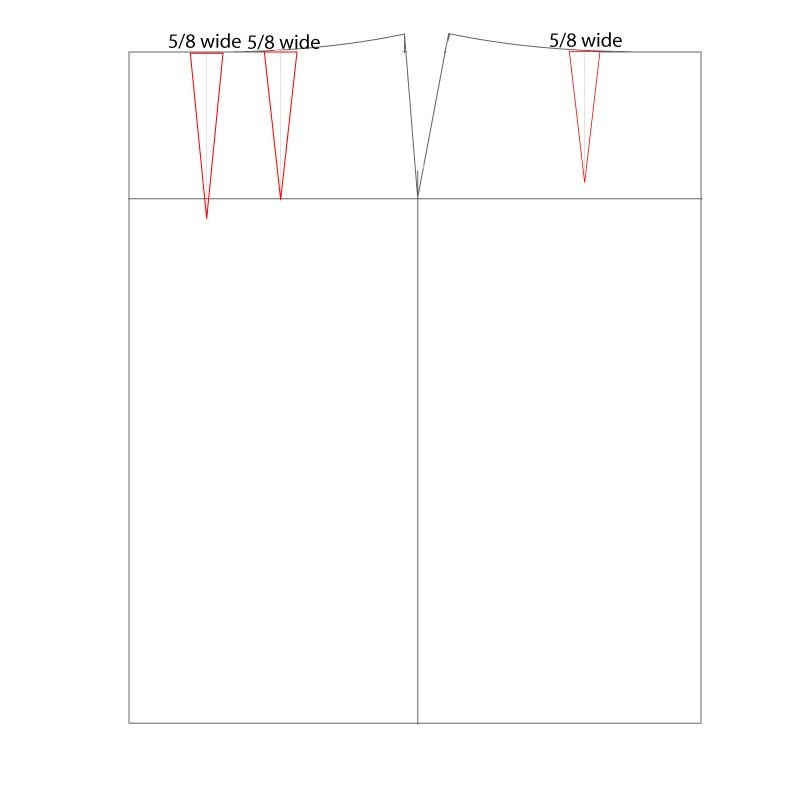
8. Almost done! Label your sloper. Here are the labels I use.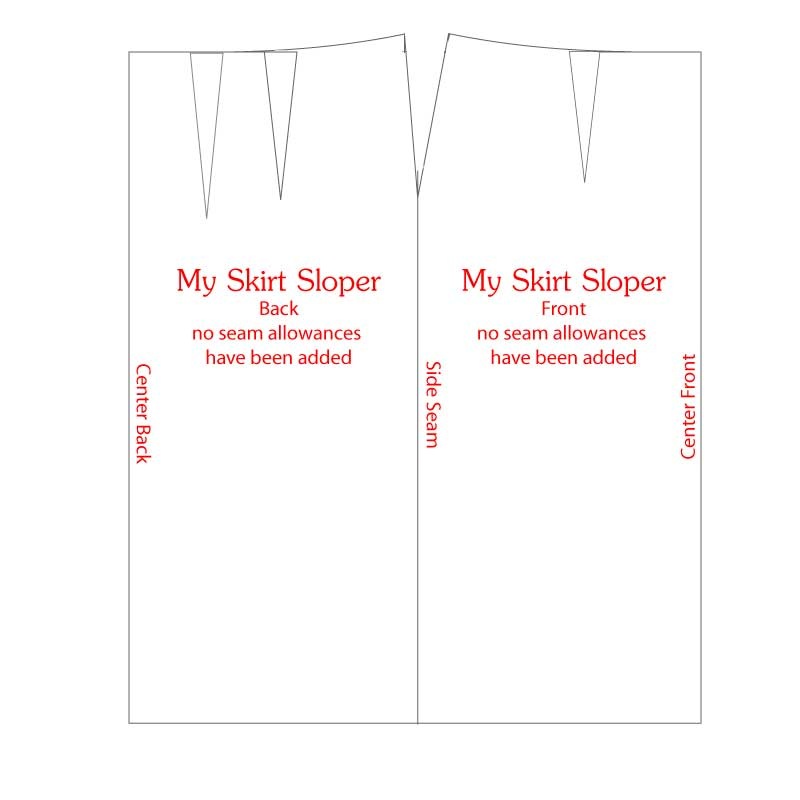
So…how’d you do?
Here’s your assignment for next time:
1. Cut out your sloper. Don’t forget to cut down that center line, separating your front and back pieces.
2. Trace both pieces of your sloper onto another sheet and add 1 inch around each piece. Be sure to trace your darts too.
3. Grab some fabric to make a muslin (a practice skirt). You can raid your stash or grab something from the remnant bin at your favorite shop. You’ll need 1 1/2-2 yards (basically, 2 x your waist to hip measure).

